Fetching Logs from Amazon Security Lake: A Detailed Guide
Learn how to how to fetch logs from Amazon Security Lake.
Fetching logs from your various applications is an essential, often repeated component in countless cybersecurity workflows and playbooks. The problems arise, however, when it comes to compiling this data and ensuring its uniformity across multiple platforms or sources.
Fortunately, depending on your setup, Amazon Security Lake simplifies security analysis by centralizing logs and events from multiple connected AWS services.
The following post provides a detailed walkthrough on fetching logs from Security Lake.
Prerequisite: In order to fetch logs from Amazon Security Lake, you will need to first have the role of a Global Administrator. Please ensure that you have the necessary role before following this guide.
Supported AWS Services as Sources:
Security Lake can collect logs from a variety of native AWS services, including:
- CloudTrail Management and Data Events (S3, Lambda): CloudTrail tracks AWS API calls for your account, including user activities, source IP addresses, and timestamps. Security Lake can collect CloudTrail logs for management operations (control plane events) and data plane operations (S3 and Lambda events) on resources in your account.
- Amazon EKS Audit Logs: Gain insights into activities performed on Kubernetes resources running in your Amazon Elastic Kubernetes Service (EKS) clusters. Security Lake directly consumes these logs without affecting your existing EKS control plane logging configurations.
- Amazon Route 53 Resolver Query Logs: Track DNS queries made by resources within your Amazon Virtual Private Cloud (VPC) to understand application behavior and identify potential security threats. Security Lake collects these logs directly from Route 53, independent of your existing configurations.
- AWS Security Hub Findings: Security Hub centralizes security findings from various sources, including AWS services, third-party integrations, and security best practice checks. Security Lake collects these findings and transforms them into a standardized format (Open Cybersecurity Schema Framework - OCSF) for easier analysis.
- Amazon VPC Flow Logs: Capture information about IP traffic flowing to and from network interfaces within your VPC environment. Security Lake directly consumes these flow logs without impacting your existing VPC configurations.
Note: AWS Security Lake documentation confirms support for Open Cybersecurity Schema Framework (OCSF) schema version 1.1.0. However, it might not necessarily support the latest version of the OCSF schema which is v1.2.0.
Adding an AWS Service as a Source:
Prerequisite: Before creating a source, you must create a region. That is, you will only be able to create a source if a region is created first).
1 - Access the Security Lake Console: Open the Security Lake console at https://console.aws.amazon.com/securitylake/.
2 - Navigate to Sources: From the navigation pane, select Sources.
3 - Choose Source Type:
- Sources: This option displays all available pre-configured AWS services as data sources.
- Custom Sources: This option allows you to choose specific AWS services (one or two) as data sources based on your needs.

4 - Configure the Source:
- Select the desired source (either from "Sources" or by creating a "Custom Source").
- Click on Configure.
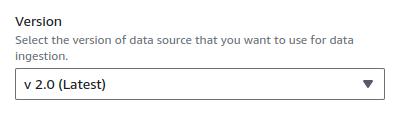
5- Source Settings:
- Enable the source.
- Select the data source version (typically the latest version is recommended, but currently, Security Lake supports OCSF version 1.1.0, which is represented as 1.2.0 in AWS).
6 - Choose Regions:
- Select the specific Regions for which you want to collect data. Security Lake will collect data from all accounts within those Regions for the chosen service.
7 - Enable Source:
- Click "Enable" to initiate log collection from the chosen service and Regions.
Adding a Subscriber:
- Go to Subscribers: From the navigation pane, choose "Subscribers".
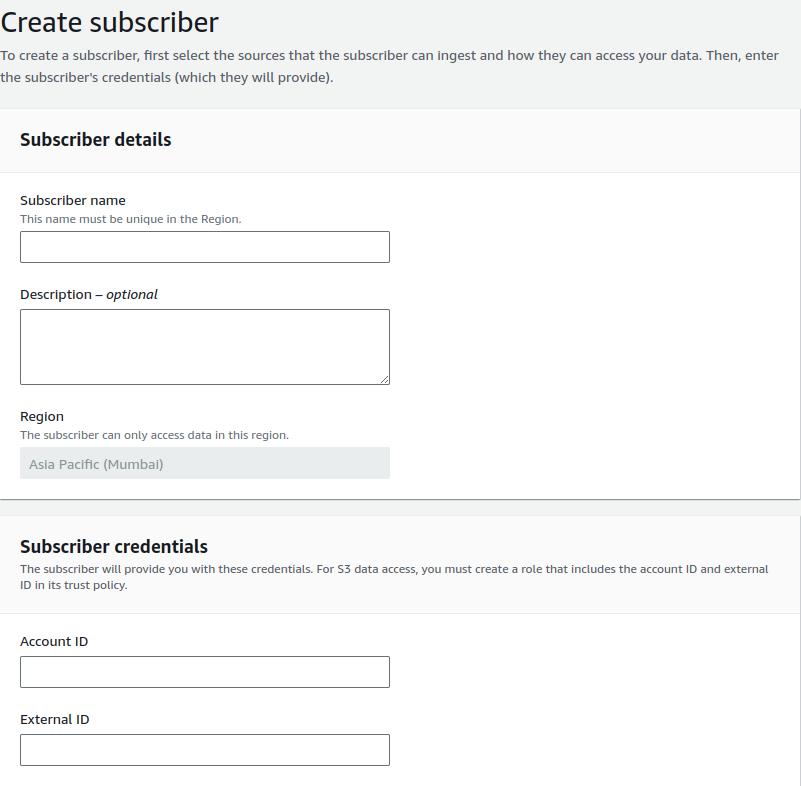
- Create Subscriber: Click "Create Subscriber".
- Subscriber Details:
- Enter the name of the subscriber.
- Select the Region where the subscriber will access data.
- Provide the Account ID and External ID of the subscriber.
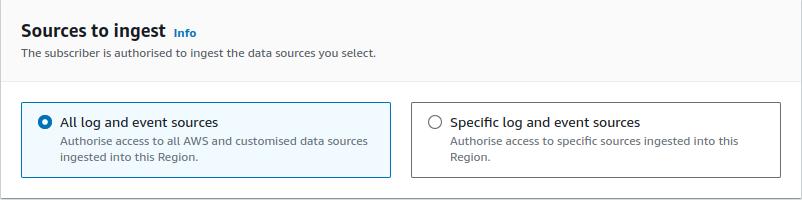
- Sources to Ingest:
Choose either All log and event sources or Specific log and event sources depending on your needs.
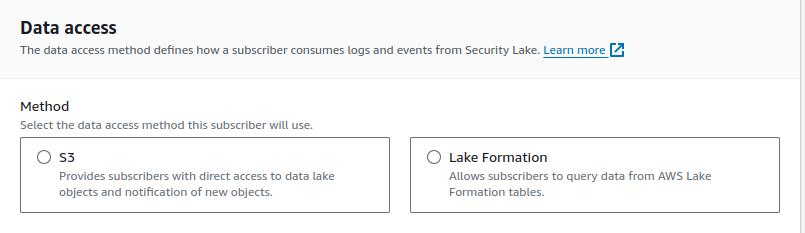
5. Data Access Methods:
- S3 Bucket: When you select S3 Bucket, you will get two options to fetch data sources from:
- SQS Queue: Security Lake will create an S3 bucket and SQS queues for the subscriber to access data.
- Subscription Endpoint: Here, you can enter the endpoint URL for the subscriber to access the data.
- Lake Formation with Queries: Subscribers can access data using Lake Formation queries.
Notes:
- As mentioned earlier, you need to create a region before adding a source. The region selection happens when you choose the source and configure it.
- The version mapping from AWS to OCSF is as follows:
- 1.1.0 in AWS represents OCSF schema 1.0.0.
- 1.2.0 in the console represents OCSF schema 1.1.0.
- Security Lake does not currently support the latest version of the OCSF schema (1.2.0).
Conclusion:
By leveraging Security Lake and following these steps, you can centralize security logs from various AWS services, enabling comprehensive security analysis and threat detection within your organization. Security Lake simplifies log management and streamlines security investigations.
Also Read: Leveraging Amazon Security Lake for Enhanced XDR
Metron has experience integrating Amazon Security Lake with multiple security platforms. If you are considering any custom solution, please send a note to connect@metronlabs.com.