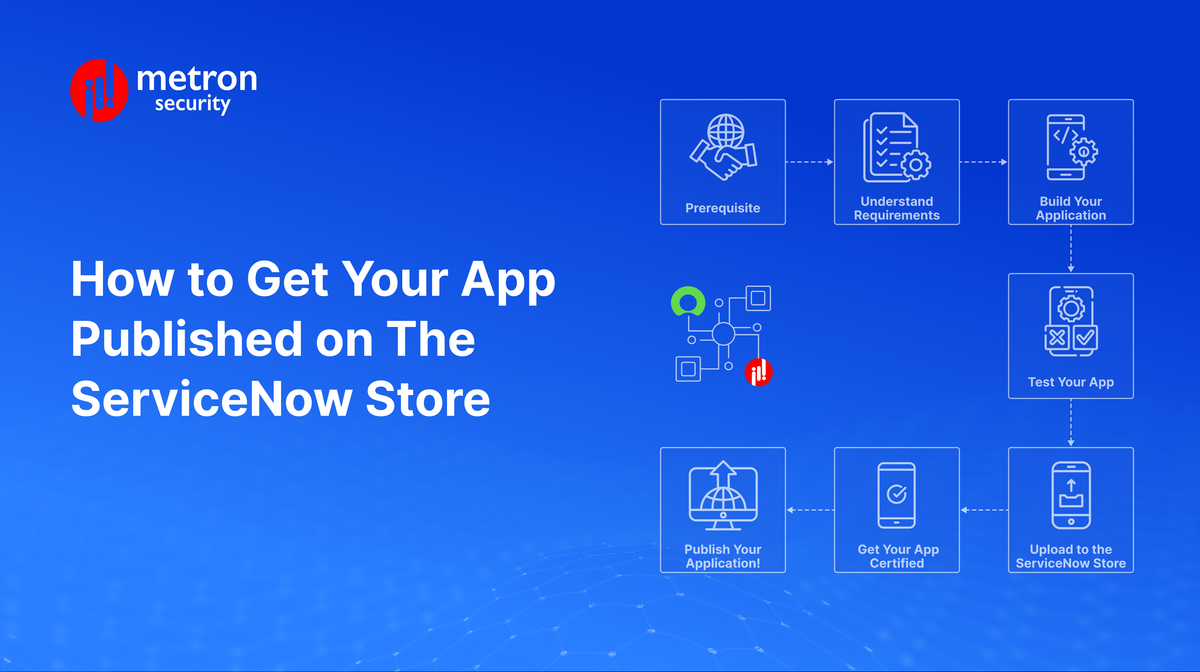
How to get your app published on the ServiceNow Store
The ServiceNow Store is the central repository for workflow apps and certified integrations. Learn how to publish your app on this platform.
The ServiceNow Store is the central repository for certified apps and integrations from qualified partners. It can provide valuable visibility for workflows, connections, and other apps listed here, as well as acting as a major trust signal for users seeking the solutions provided.
Things to keep in mind before publishing your app
Building a robust ServiceNow app begins with a design that demonstrates all the components that will be created as a part of the app. Before diving into development, it's important to define the tables that will store and structure your application's data. To do that, you must have a clear understanding of your application's architecture, including the necessary services, data relationships, and potential data import needs.
You will need to have a nuanced understanding of ServiceNow and its instances in order to overcome any potential challenges that you may encounter while developing the application. ServiceNow may throw unique challenges at you at multiple turns.
Think of your app's tables as its building blocks. Each table stores specific data points, and their interlinking shapes the app's functionality. For example, an app requiring data from multiple sources needs to incorporate import sets into its design to seamlessly bring external data in.
Therefore, carefully planning your tables isn't just about data storage; it's also about paving the way for an efficient, well-organized application. By taking the time to design your app, you'll build a stronger foundation for development, ultimately leading to a successful app.
Apart from that, there are certain things you need to take care of so that ServiceNow accepts and publishes your application in their store for anyone to download and use.
Additional Steps to Consider Before Submitting
- Polish your app: Ensure your app aligns with ServiceNow's guidelines and best practices. They wouldn't want glitchy apps causing hiccups, would they?
- Do multiple test runs: Identify the small syntax errors or security vulnerabilities before they cause trouble and rectify them.
- Don't forget to bring these key components for publication:
- High-resolution screenshots: Showcase your app's features and functionality through clear and precise screenshots.
- Concise description: Briefly explain what your app does and why it's useful, like a compelling elevator pitch.
- Detailed documentation: Provide a comprehensive guide for installation, configuration, and use, like a manual.
Now that you have everything ready, it's time to upload your app and get it published.
How to get your app published on the ServiceNow Store?
Whether you are a novice to the platform, or even if you have some experience, a guided process can be helpful for quickly and efficiently publishing your application on the ServiceNow platform. In this post, we will discuss in detail the steps you need to take in order to successfully publish your application on the Now platform.
A Step-by-Step Approach to Publishing Your App on ServiceNow
Step 1: Prerequisite: Become a Member of ServiceNow’s Technology Partner Program
In order to publish your app on the ServiceNow Store, you must be a part of their Technology Partner Program. It is a mandatory requirement for all publishers. To do so, you can sign up for their Technology Partner Program on the ServiceNow Partner portal. Through this, you will get access to the Hi portal of ServiceNow which allows you to manage the apps you choose to submit to the ServiceNow Store.
Step 2: Understand Your Requirements
Before building your ServiceNow app, consider whether it fills a critical gap in functionality, offers innovative features, or seamlessly integrates with your existing tech stack. Since ServiceNow contains an ocean of tools and applications that can be leveraged in some way or the other, check if there is an app already present in the store that fits your requirements before you start building your application to publish it to the ServiceNow Store.
If your requirements are specific, like you want to pull data from a third-party platform to ServiceNow or you want to perform an action on the third-party platform triggered from ServiceNow, you need to develop an app that meets your needs.
Step 3: Build Your Application
To be able to publish your app, you must have an app to begin with. If you have not already done so, you can build your application using the ServiceNow Studio. The ServiceNow Studio offers a visual drag-and-drop user interface for you to develop your apps without coding. With the Studio, you can also make changes to specific components of your application as and when required. For this, you need to request a vendor instance from ServiceNow.
ServiceNow Studio offers immense power, but it can be challenging to master using the ServiceNow Studio. Building apps requires navigating a vast ecosystem of workflows, and integrations that one must be thorough with. An in-depth understanding of ServiceNow’s functional libraries, testing framework, APIs, and more will help you develop your app without any roadblocks.
Step 4: Test Your App
Of critical importance, you need to ensure that the app works as expected. Before publishing, fix bugs, and gather user feedback so that the users do not face any challenges while using the application.
- Unit testing: You need to test individual functions of the app and its logic components.
- Integration testing: You must rigorously test how your app interacts with other applications and systems.
You should also have your application scope in terms of what the application does, what its goals are, what problems it is fixing, and so on.
Step 5: Upload Your App to the ServiceNow Store
- Using your vendor instance, you need to go to the application record and follow the process mentioned:
- Go to System Applications. Click on My Company Applications.
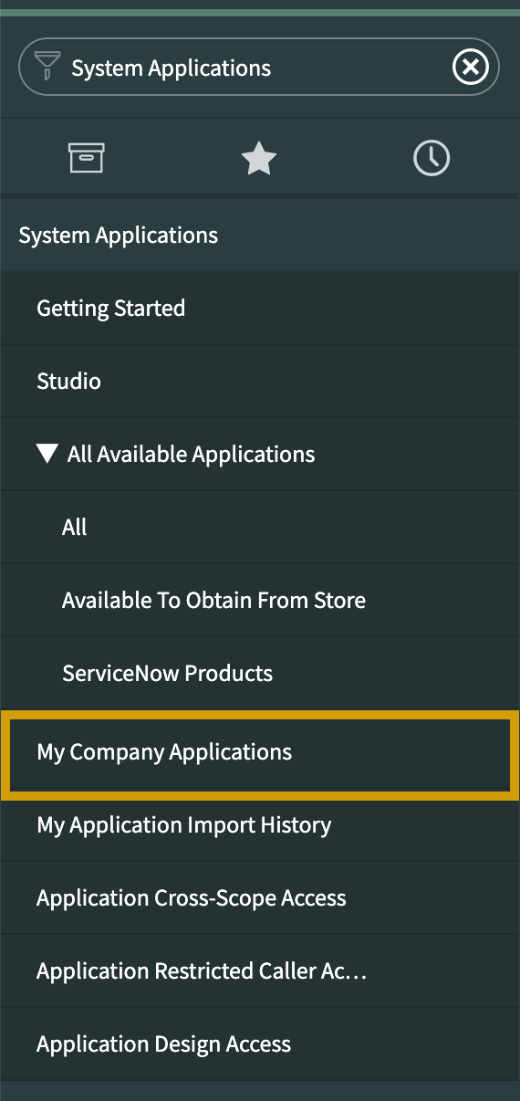
Source: ServiceNow
- Select the name of your application.
- Open your application record by clicking on the respective application name.
2. Make sure that you have selected your application in the application picker. If not, you will see an error message on top of the screen
3. Now, you need to submit your application to the ServiceNow store
- Scroll to the bottom of the page and click on Publish to ServiceNow Store.
- Enter the required information - Version, Dev Notes, and “Hi portal” login credentials.
- Click on Submit.
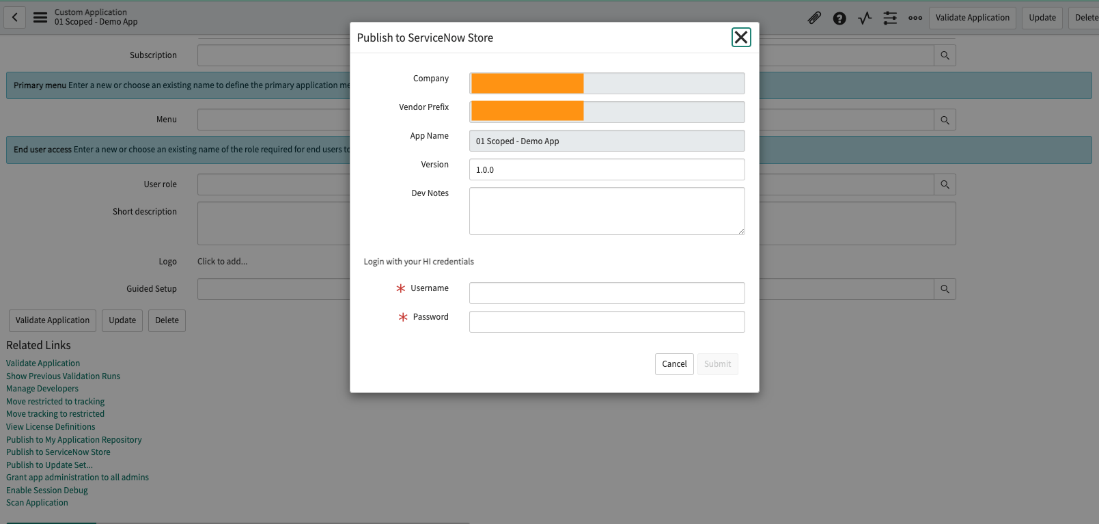
Source: ServiceNow
Step 6: Get Your App Certified
Your application will now be available in the application repository of ServiceNow. However, for users to be able to download and use your app, it needs to be certified.
Here is how you can get your application certified:
- Log in to ServiceNow’s Store Publisher Portal.
- Click on the Certify tab.
- Click on your application name. Here, you will see that there are 2 types of review - App Review and Listing Review.
App Review: The App Review primarily deals with the code and design of the application where you are required to submit - that is, the app design document and test plan with the results for Service Now’s certification team and the installation guide for the users.
The certification team reviews the performance, security, and stability of the application. Additionally, the team also checks the user interface and experience, the app installation process, and the architecture of the app to make sure that it follows the best practices of ServiceNow.
During the App Review, the app goes through the following stages:
- In draft
- Draft complete
- In review
- Update Required
- Complete
Listing Review: The listing review is largely focused on the accuracy of the app and its documentation and whether the app adheres to the branding guidelines. For the listing review, you are required to submit resources like demo videos, marketing documentation, and more.
The listing review consists of stages similar to that in the App Review with just one change:
- In draft
- Draft complete
- Marketing review
- Update Required
- Complete
Note: Click on Validate Application if you have not run the Self-Test tool even once on the current version of your application before submitting.
- On the App Review tab, upload the necessary documents and click on Submit for App Review.
- On the Listing Review tab, upload the necessary documents and click on Submit for Listing Review.
Once you submit your app for certification review, it will typically take between 3 and 5 weeks for the review process to be completed during which the team may require the following:
i. Demo on a ServiceNow instance.
ii. Making the changes recommended by ServiceNow during their review.
Your app is now ready to be published!
Step 7: Publish Your Application!
Once your application is approved, you will be able to publish your app by clicking on the Publish button on your “Hi portal”.
By following these steps thoroughly, you will easily manage to get your app published in the ServiceNow store!
Metron Security provides on-demand and effective approaches to managing third-party integrations for security ecosystems. Since 2014, Metron has delivered automation solutions for over 200 security applications along with several hundred custom automation solutions.
If you are looking to set up any integrations with ServiceNow and are facing challenges, you can reach out to us at connect@metronlabs.com.