How to Set Up IBM QRadar SIEM on a Standalone VM [2024]
We walk you through setting up your IBM QRadar SIEM using a standalone virtual machine.
![How to Set Up IBM QRadar SIEM on a Standalone VM [2024]](/content/images/size/w1200/2025/11/How-to-Set-Up-IBM-QRadar-SIEM-on-a-Standalone-VM--2024-.png)
Introduction:
The IBM QRadar SIEM (Security Information and Event Management) boasts a modular architecture, offering instantaneous insight into your IT infrastructure. This insight proves invaluable for threat detection and prioritization. Like many leading security solutions, QRadar is designed to be scalable, allowing you to tailor it to your specific requirements for log and flow collection, as well as analysis.
In the following guide, we will walk you through setting up your IBM QRadar SIEM using a standalone virtual machine.
Prerequisites:
Before installing and using the resilient server, users will need:
- A PC (Host Machine, not a VM) with 24+ GB of RAM. We have tested on Ubuntu Linux 20.04LTS, but Windows should work
- Oracle VirtualBox
Instructions:
- Create a Virtual Machine using VirtualBox with the following configuration:
- 16 GB RAM
- 200 GB dynamic VDI
- 4 CPUs
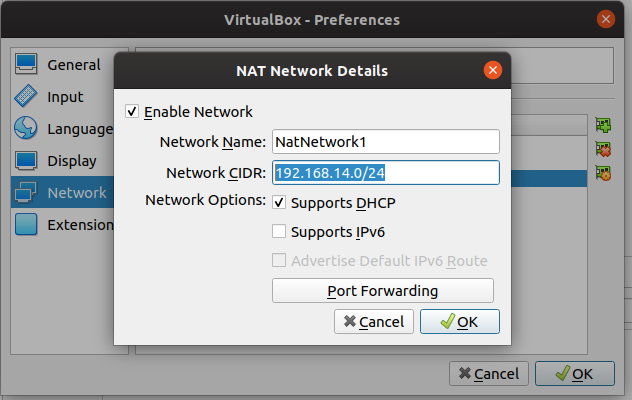
- NAT (this is the default option) OR NatNetwork with;
- Network CIDR as 192.168.14.0/24 (if you have a different range, you need to modify the network details accordingly while installing)
- DHCP Support enabled
- Download QRadar 7.5.0 ISO from:
- Insert the QRadar ISO into the optical drive and Start the virtual machine.
- Next, follow these steps:A.) Start the VM and when it asks for REBOOT, HALT, FLATTEN or WIPE choose the option to FLATTEN.
B.) This will install the Redhat OS and initialize the Qradar setup in it.
C.) After the above step the installer will again ask for REBOOT, HALT, FLATTEN, or WIPE, choose the option HALT.
D.) This will power off the VM.
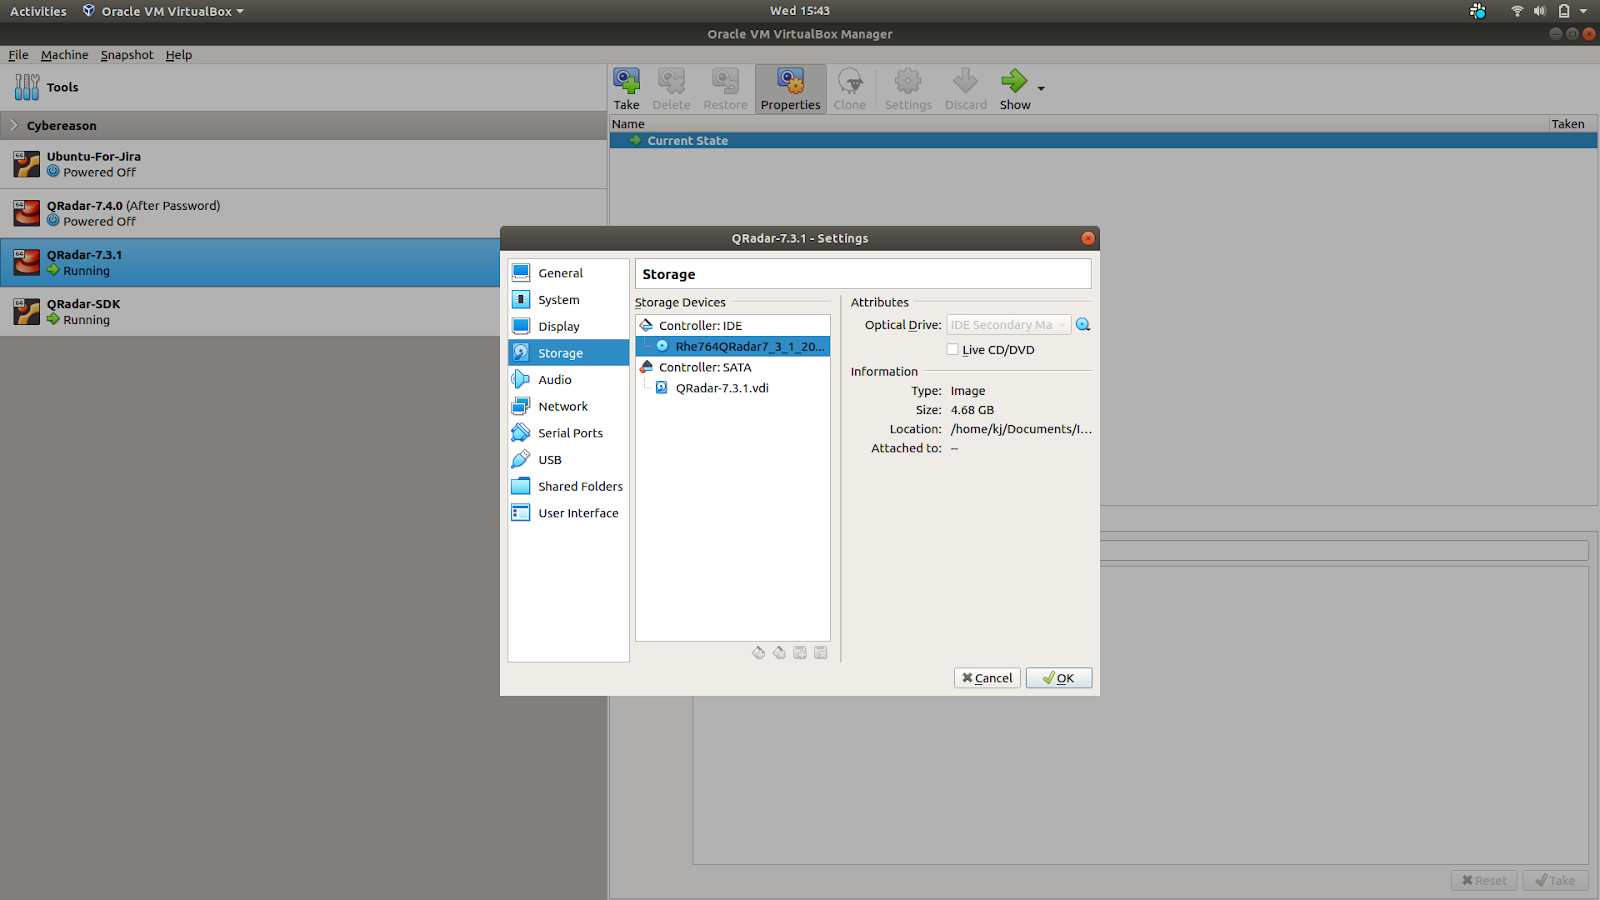
E.) Go to the ”Properties” of the VM and in the “Storage“ tab remove the optical drive attached in step 1.
F.) Restart the VM and hit enter on “Factory Install“, then move on to where the console should ask you to log in.
5. Type 'root' when the console asks you to log in.
- Accept the terms and conditions displayed on the screen by scrolling through the page (you can do so by pressing the spacebar).
Type ‘yes’ when the scroll is 100% of the way through to accept all terms and conditions.
- (Optional) If you’d like to create an App host server, please select App Host after accepting the terms and agreement.
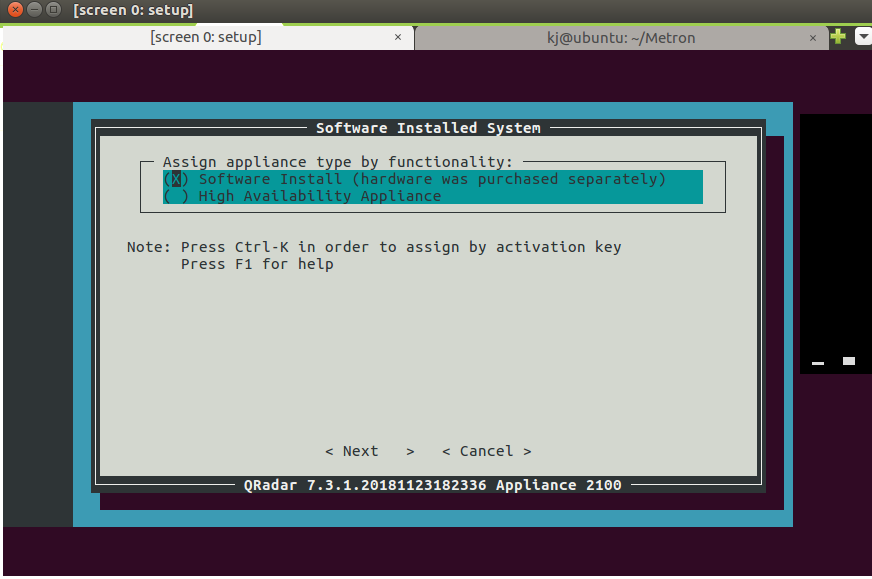
8.Now, when you reach the installing QRadar: Screen Dialogue Box, proceed by doing the following:
a) Select the Software Install option and press Enter
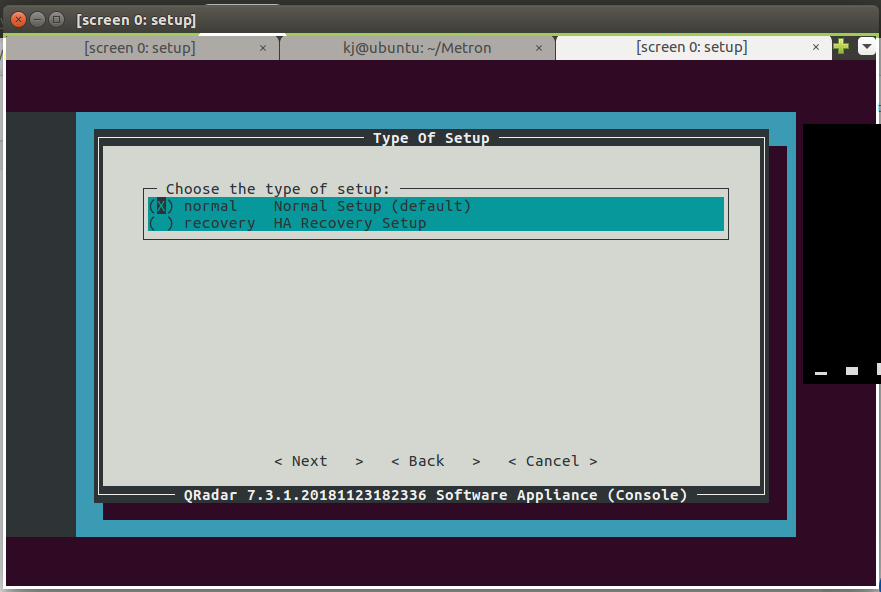
b) Select Normal Setup and press Enter
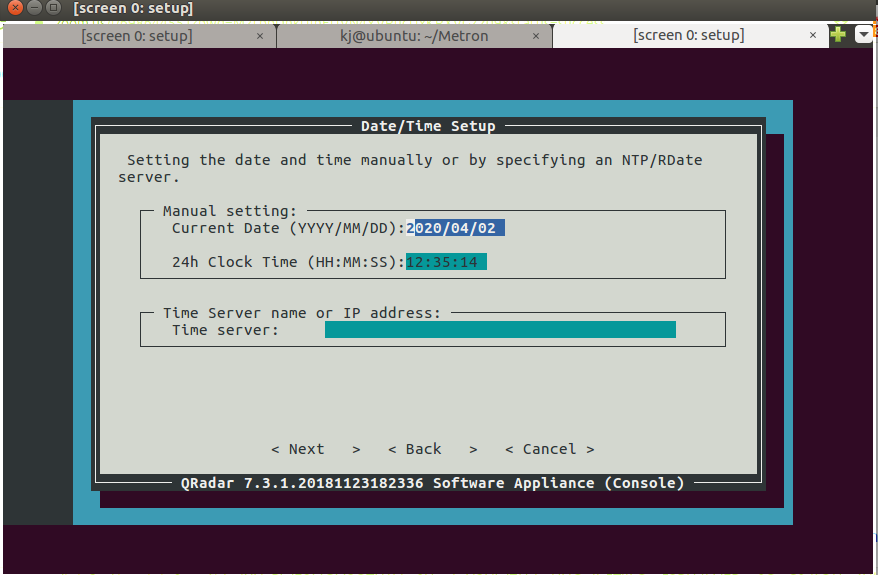
c) Keep Default and move to the next
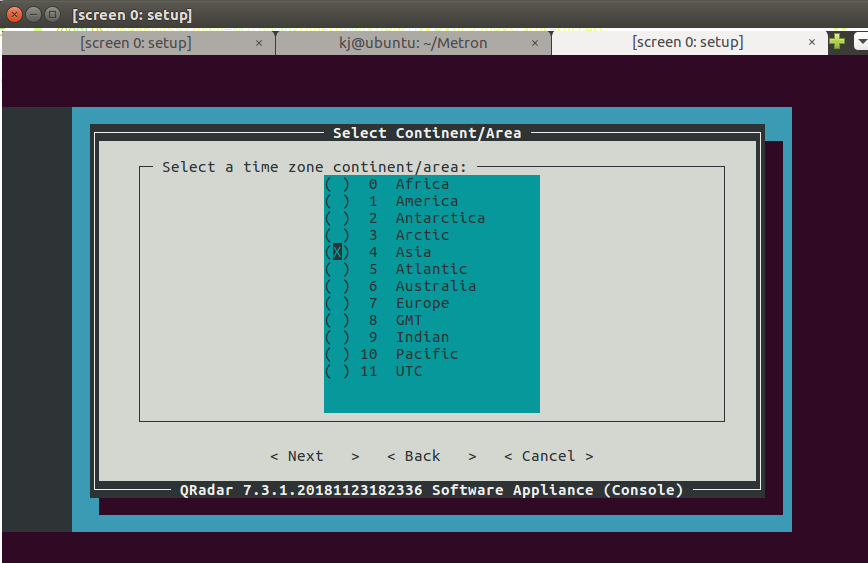
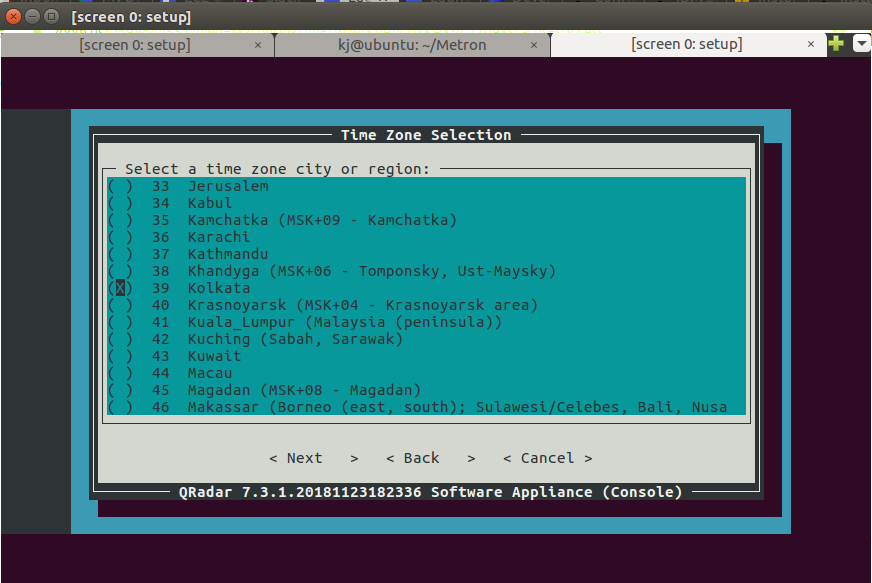
d) Select the time zone continent and press Enter
e) Select the time zone region and press Enter
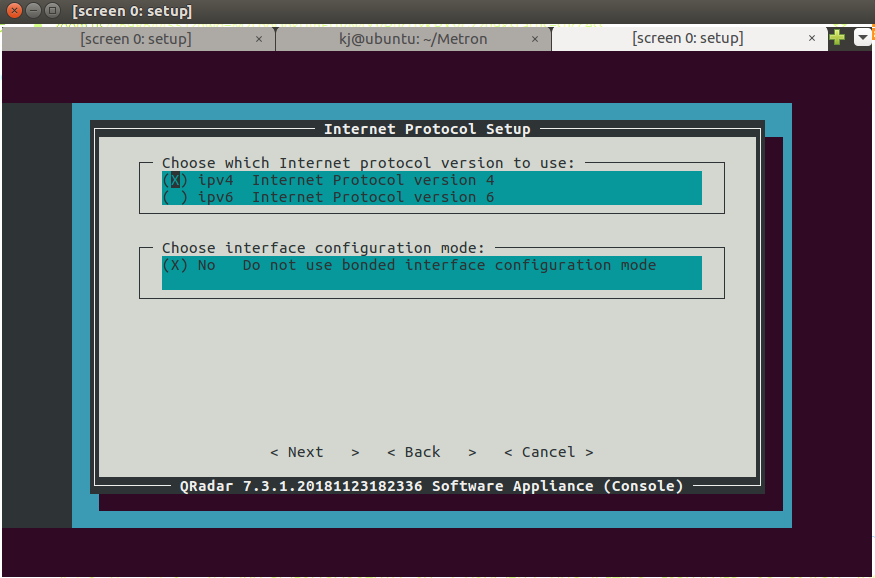
f) Select ipv4 and press Enter
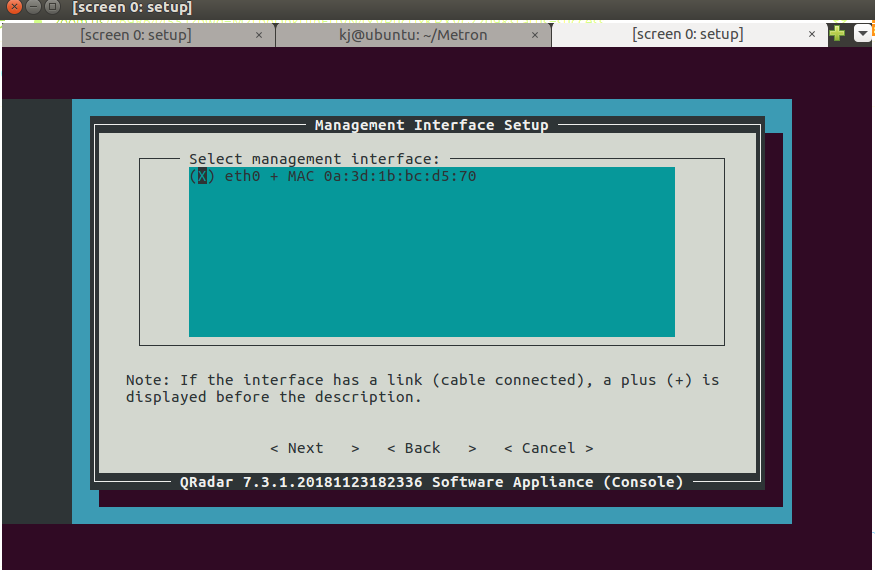
g) Select your network interface (in this case eth0) and press Enter
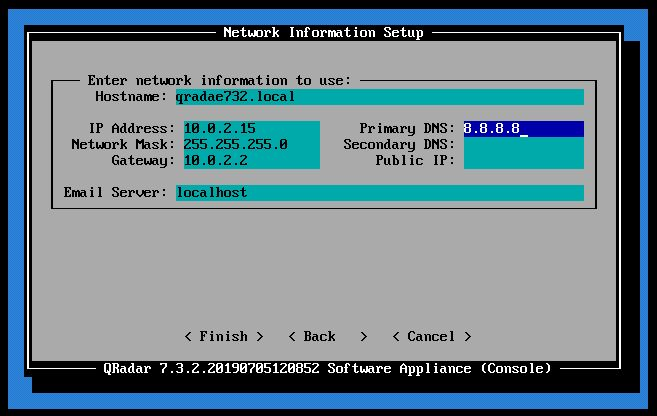
h) Installing QRadar: Screen Dialogue Box
If you have selected NAT while creating this VM, then use the following setting:
- Hostname: qradar732.local (can be any string)
- IP Address: 10.0.2.15 (Standard VirtualBox address for NAT)
- Network Mask: 255.255.255.0
- Gateway: 10.0.2.2 (VM network gateway. This is the default for NAT)
- Primary DNS: 8.8.8.8
- Secondary DNS: (leave blank)
- Public IP: (leave blank)
- Email Server: localhost
We have used 10.0.2.x because that is what VirtualBox defaulted to with NAT.
OR
If you plan to access your QRadar instance from another VM through Nat Network, use the following settings;
- Hostname: qradar 732. local (can be any string)
- IP Address: 192.168.14.32
- Network Mask: 255.255.255.0
- Gateway: 192.168.14.1
- Primary DNS: 8.8.8.8
- Secondary DNS: (leave blank)
- Public IP: (leave blank)
- Email Server: localhost
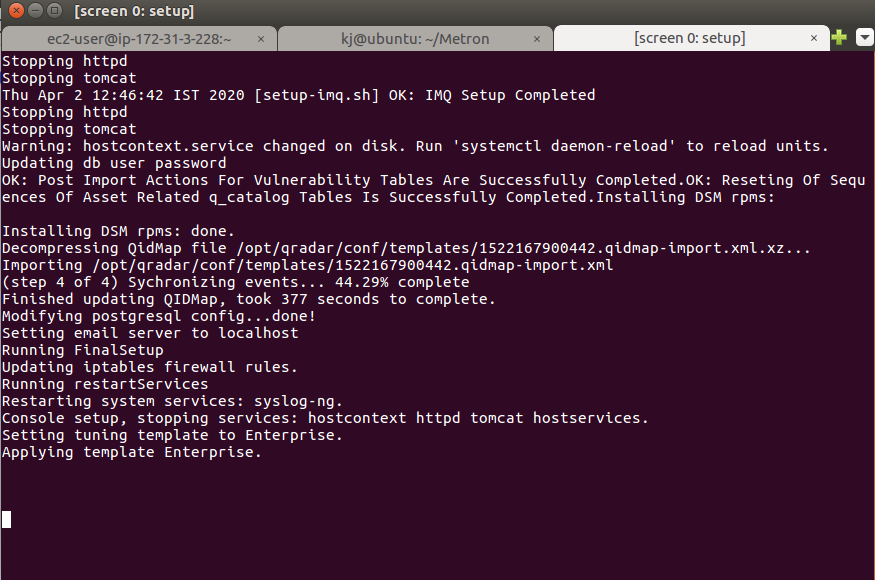
i) After this point, it takes time to reach completion. Wait for the log that says installation is complete
9. Access the QRadar Console from the browser
Use the IP address to access the QRadar console from the browser
OR
https://192.168.14.32
NOTE: If you want to access the QRadar Console from your host machine, please make sure you forward 443 ports from the QRadar VM to the host machine.
After installation:
- After installing the Qradar on the VM set the time for the Qradar machine to the Google Time server as shown in the image.
- See below:
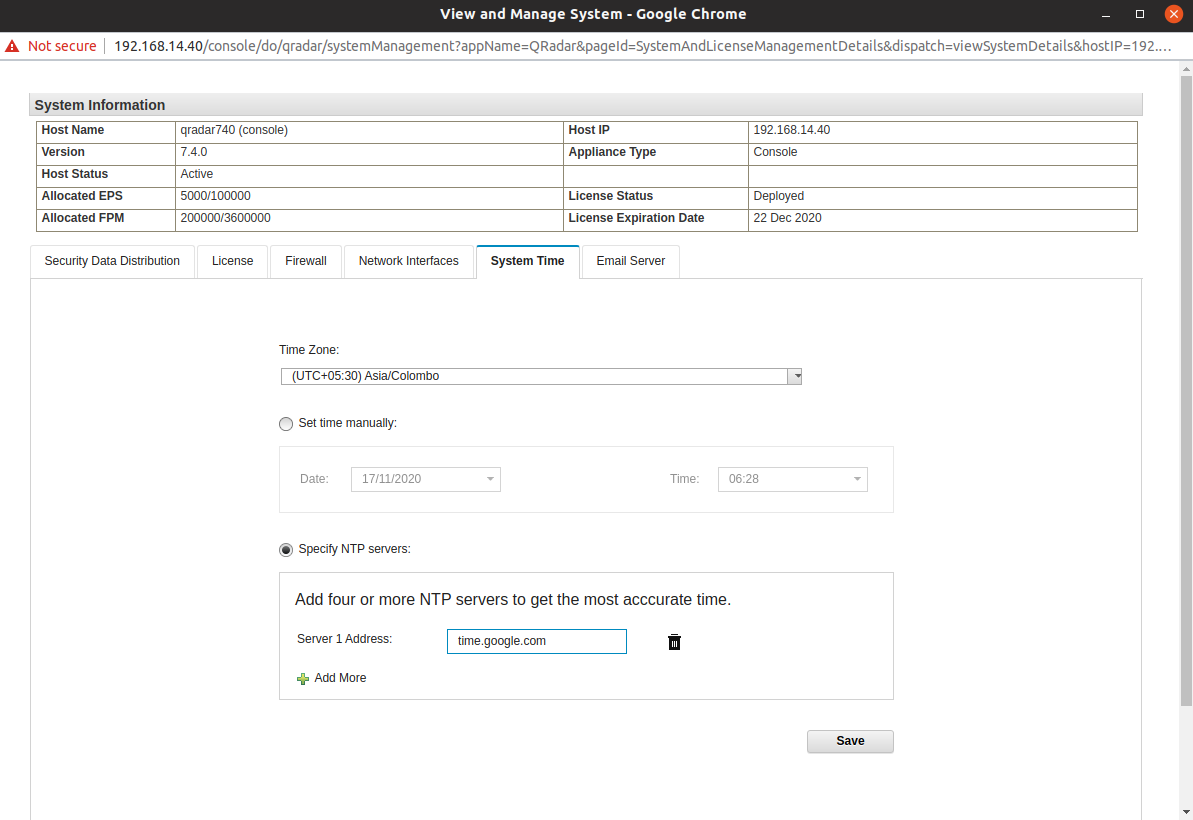
- This will help in using the QRadar instance with actual time, and not use the snapshot time, incase a snapshot of the instance is taken
Conclusion
If you were able to follow these steps, the process should be successfully concluded at this point.
In the event of installing the QRadar version before the release of 7.3.3 Fix Pack 7 or 7.4.2 Fix Pack 1 (issued on January 12, 2021), it is essential to apply the workaround to the QRadar Console. Detailed information can be found in the QRadar: 31 December License and event processing issue report (APAR IJ30161).
About Metron:
Metron is a trusted provider of on-demand and effective approaches to managing third-party integrations for security ecosystems. With extensive experience in delivering automation solutions for over 200 security applications, including IBM Resilient, Metron has earned the trust of numerous fast-growing security companies and managed security service providers (MSSPs).
Metron’s transparent development processes, deep understanding of security products, and fixed-cost model have resulted in shorter development times and significant cost savings for clients compared to deploying internal engineering teams for similar tasks. Headquartered in Novato, CA, with development offices in Bangalore and Pune, India. Should you have any questions or concerns about setting up your IBM QRadar SIEM, please be sure to reach out to us at connect@metronlabs.com .