How to Set Up QRadar on Amazon EC2 For Development Purposes
This following guide outlines the steps needed to set up QRadar on AWS for development purposes.

The following guide outlines the steps needed to set up QRadar on AWS for development purposes.
One note before we begin: For the latest QRadar (Version i.e 7.4.1 as of this writing), do not install “dracut” as given in Step 21. If you do so, there will be a version mismatch as the setup tries to install a specific version of Dracut. Instead, use Redhat 7.7 for QRadar version 7.4.1.
Instructions
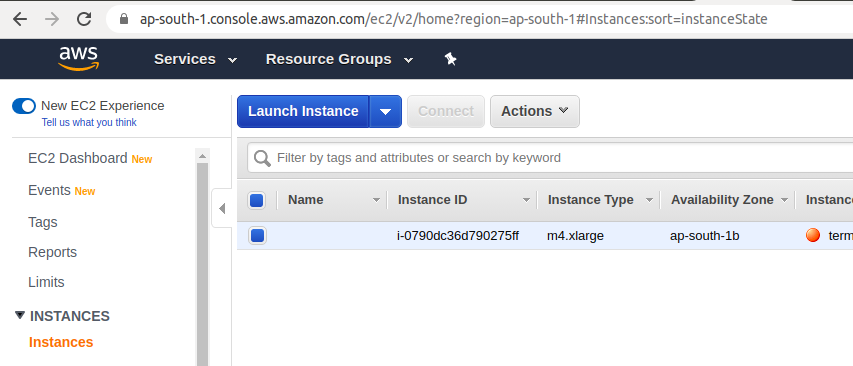
Step 1 - Launch an instance
- Log in to your Amazon EC2 console using this link.
- Go to the Instance tab on the left Menu.
- Click “Launch Instance."
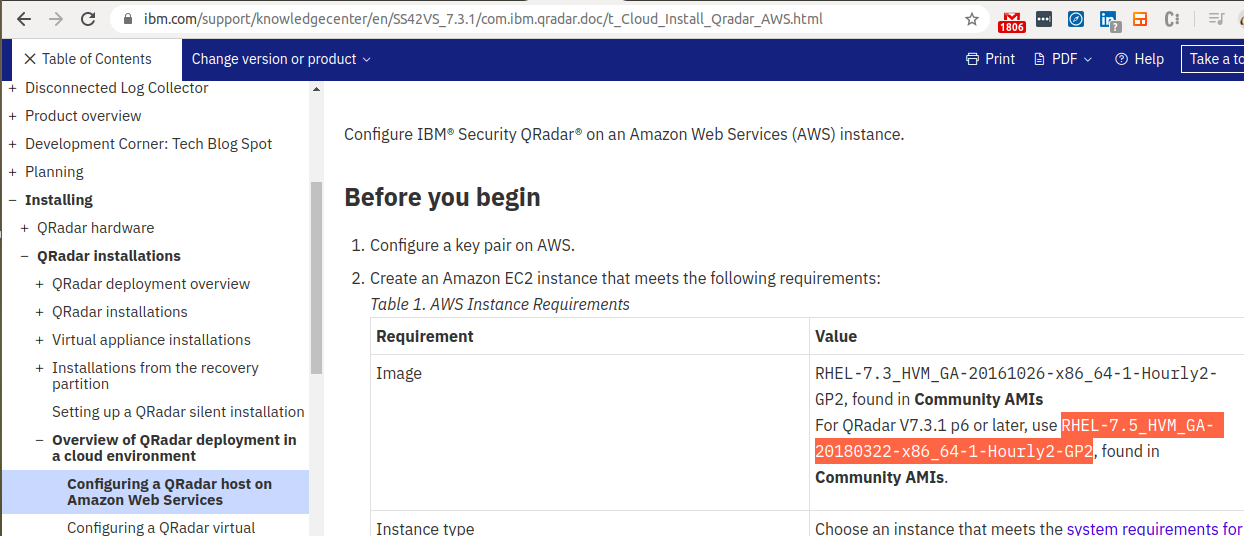
Step 2 - Get the Image Name
- To get the configuration and name of the image recommended by QRadar, go to this link.
- This EC2 instance will be created using this image.
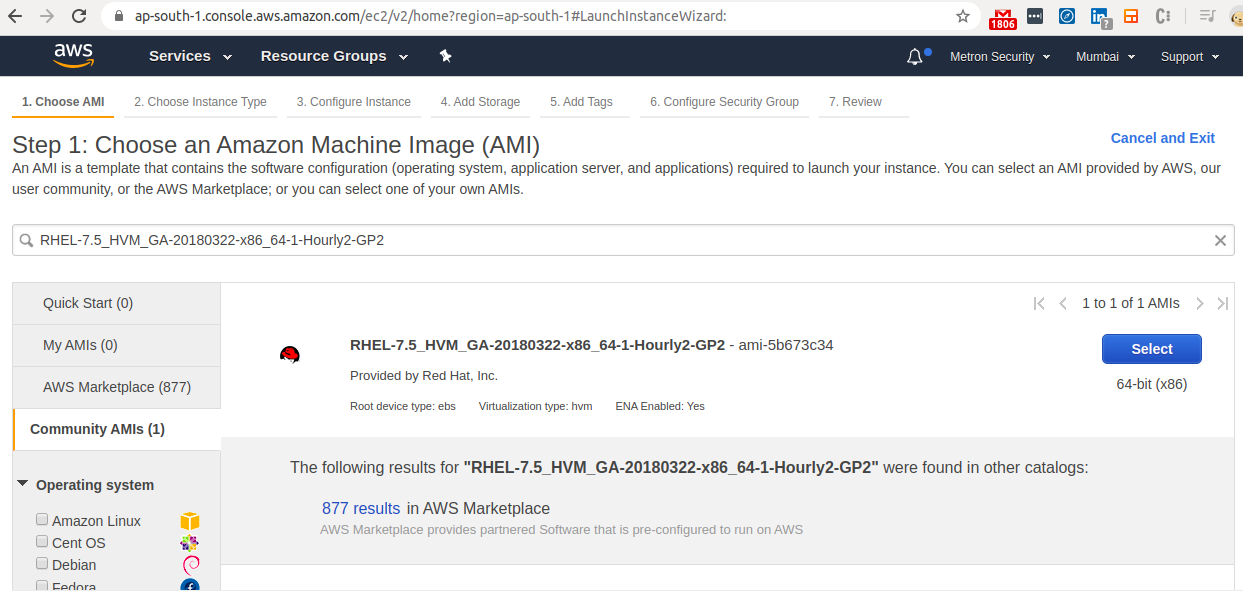
Step 3 - Search the Image in EC2
- Search the Image name copied in Step 2 as shown in the figure below.
- The Image will be found in Community AMI.
- Select the Image.
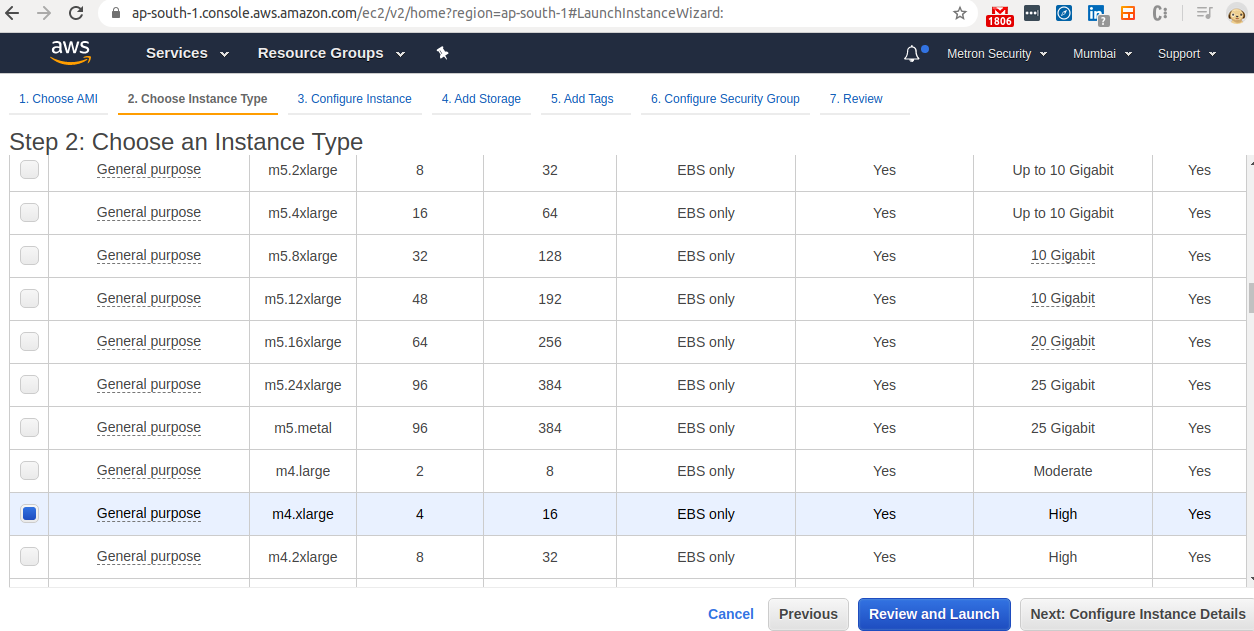
Step 4 - Choose Instance Type
- Go to the “Choose Instance Type “ tab after selecting the image.
- Select m4.xlarge instance.
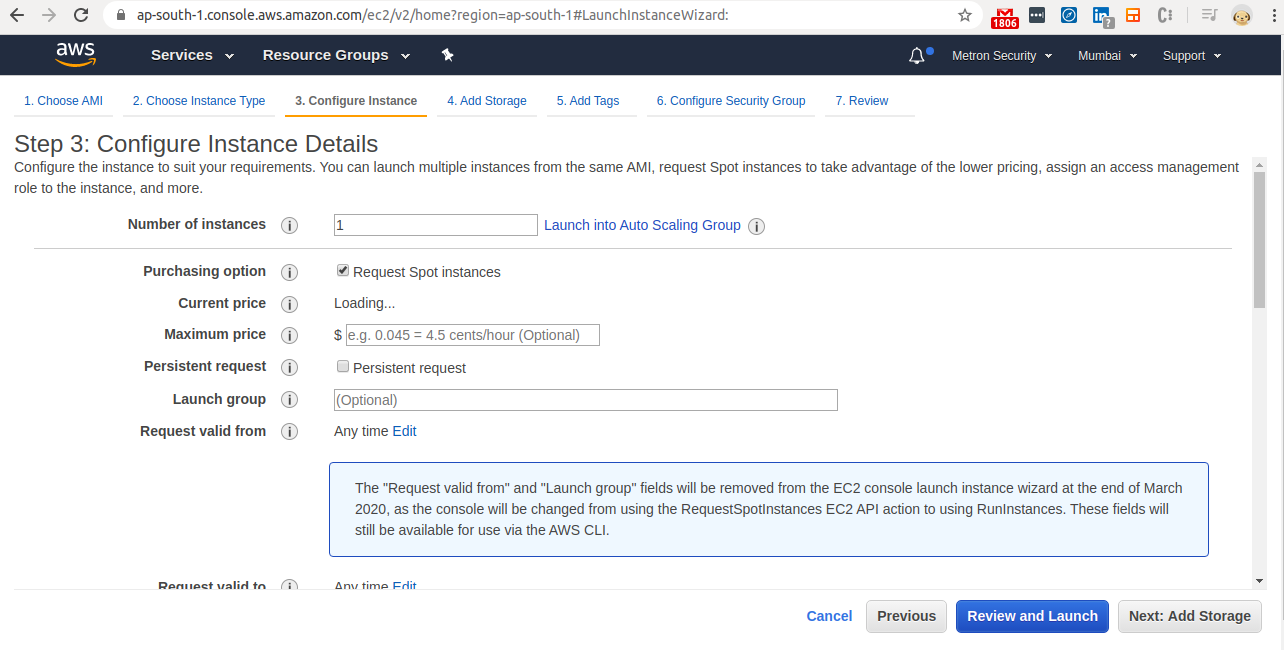
Step 5 - Configure Instance
- Click on the checkbox for “Request Spot Instances“. If you want an “On demand" instance, keep it unchecked.
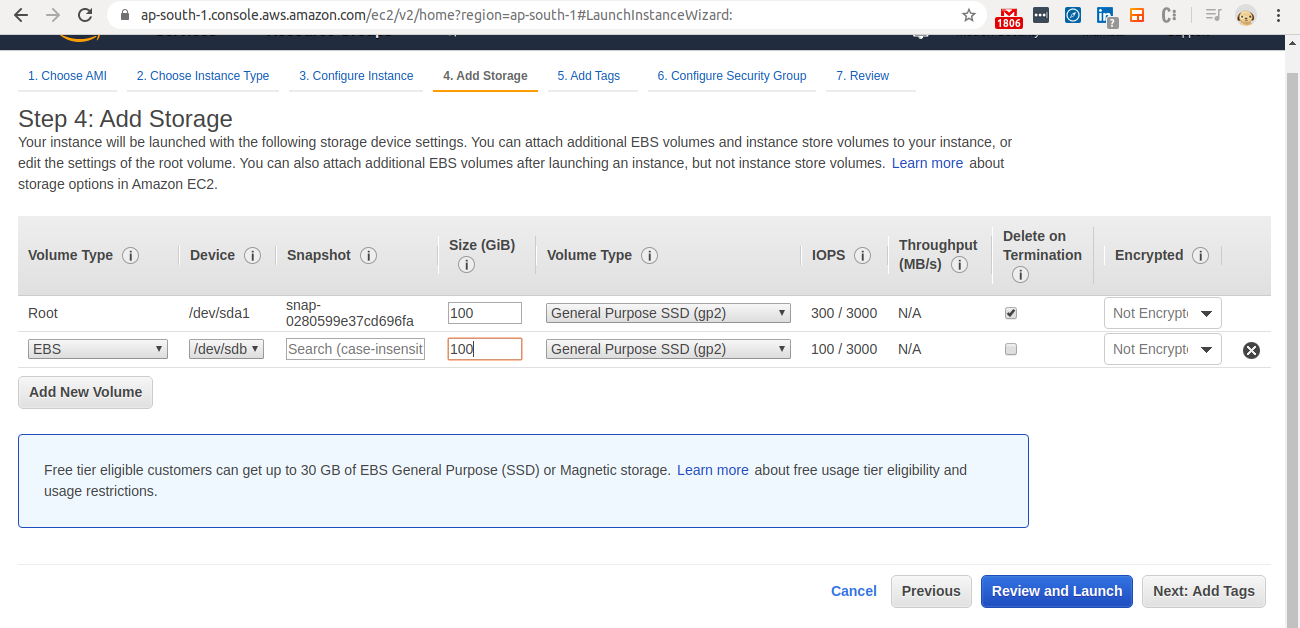
Step 6 - Add Storage
- Change the “Size“ of the 1st Volume to 100 GB.
- Then “Add New Volume."
- Change the size of the second volume to 100 GB.
- Check the checkbox under “Delete on Termination“ for both volumes.
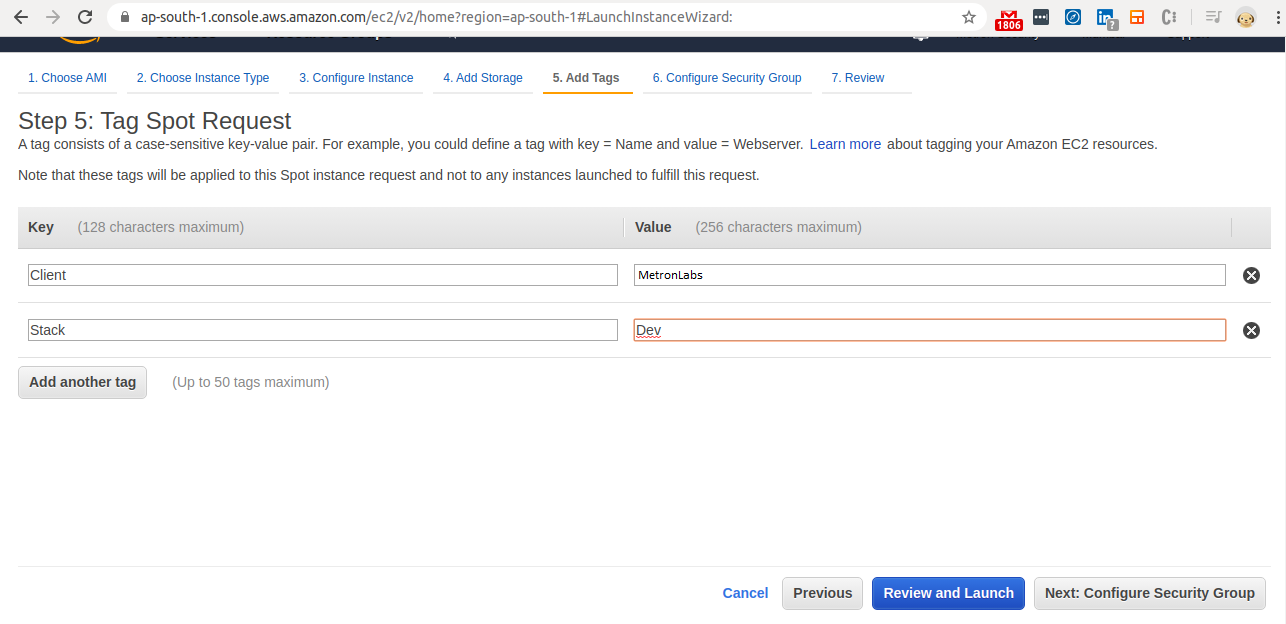
Step 7 - Add Tags
- As shown in the image, create two tags for the instance.
- As this instance is for internal use, please mention “MetronLabs“ in the Client tag.
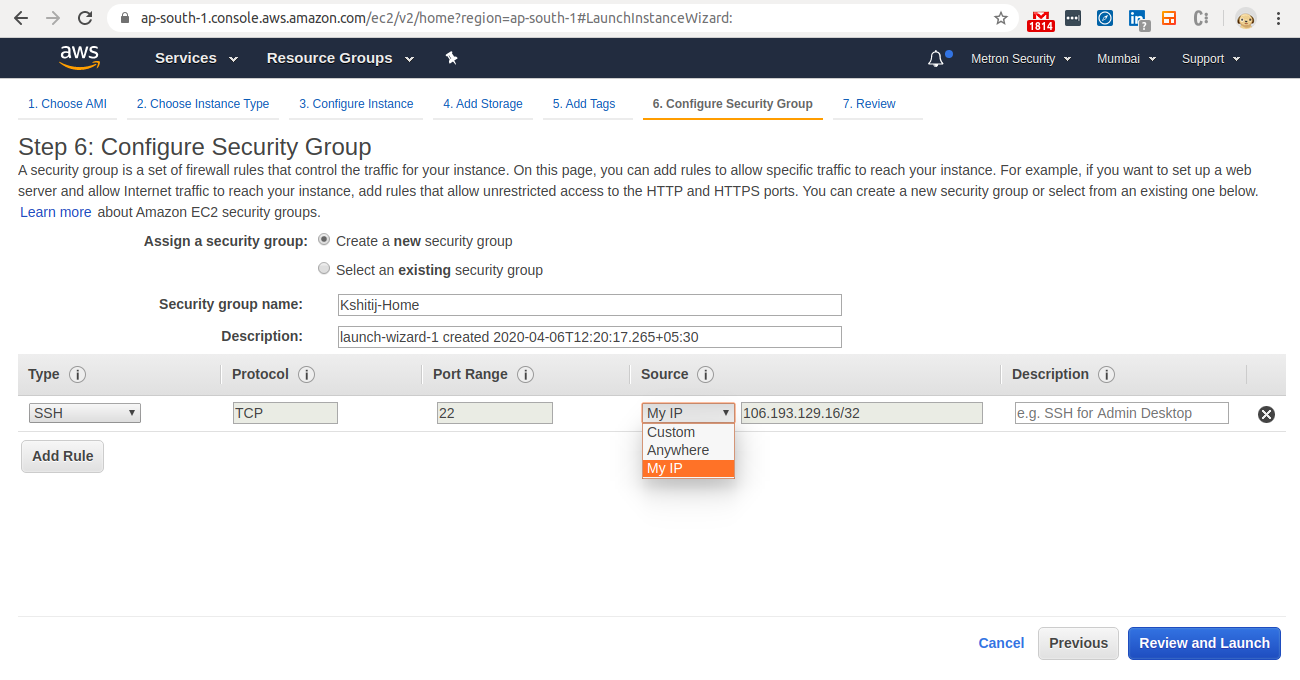
Step 8 - Configure Security Group
- Select “Create New Security Group”.
- Under Source drop down select “My IP“.
- Click “Add Rule“to add a rule for HTTPS for web access.
- Select “HTTPS” in the Type drop-down and “My IP“ in the Source drop-down.
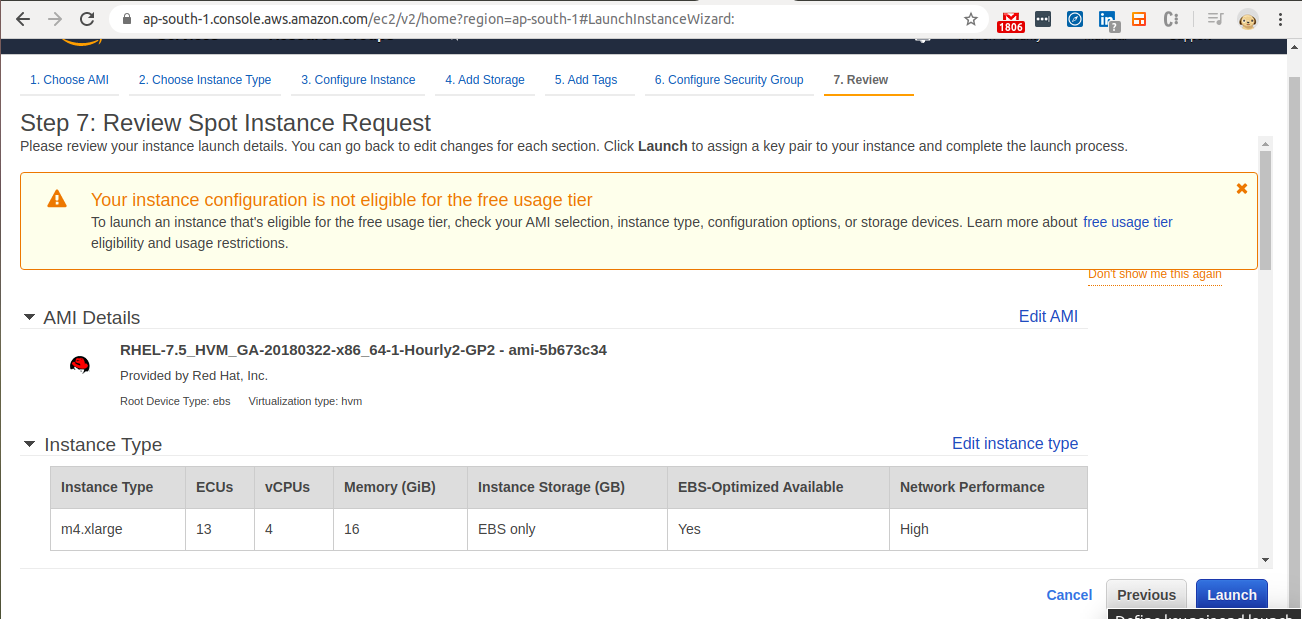
Step 9 - Review
- Review the instance and “Launch” it.
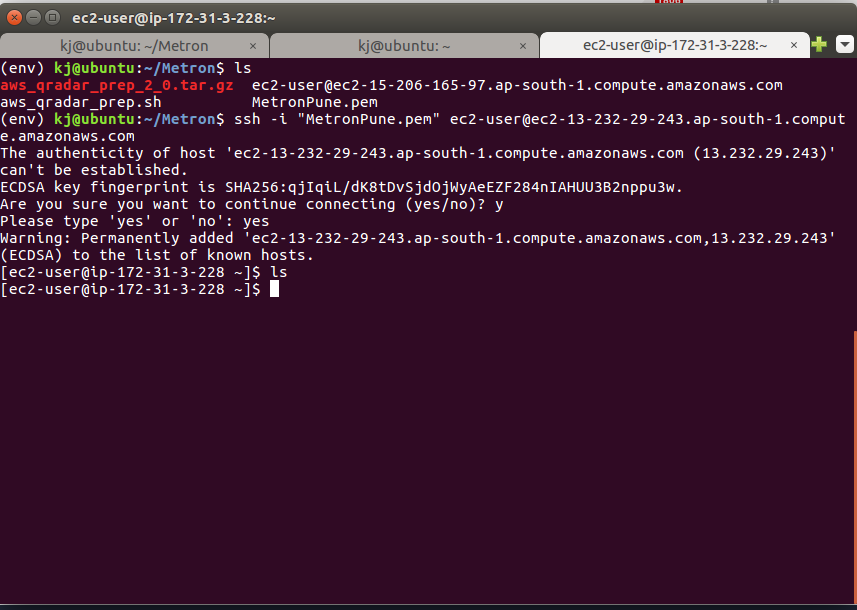
Step 10 - Connect to the instance
- Go to the folder where you have saved the pem file.
- ssh the instance as shown in the image.
Step 11 - Install polkit
- Installing
polkitwill avoid any installation error caused due to some dependency changes in 2022 packages (Redhat systems). - Execute the yum command as shown below to install the
polkit. - If it fails due to a Redhat subscription, create a Redhat developer account and use this page to add the Redhat subscription (later on you can remove it as it is not required for installation).
yum install polkit
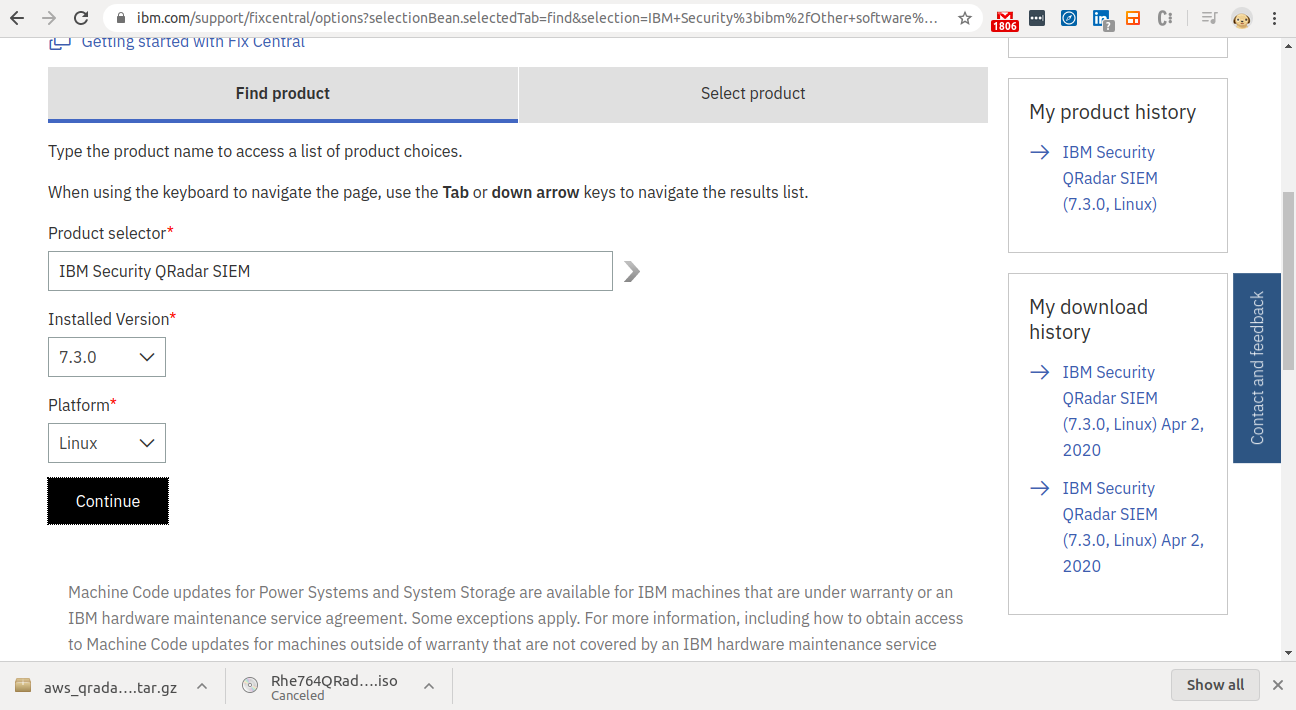
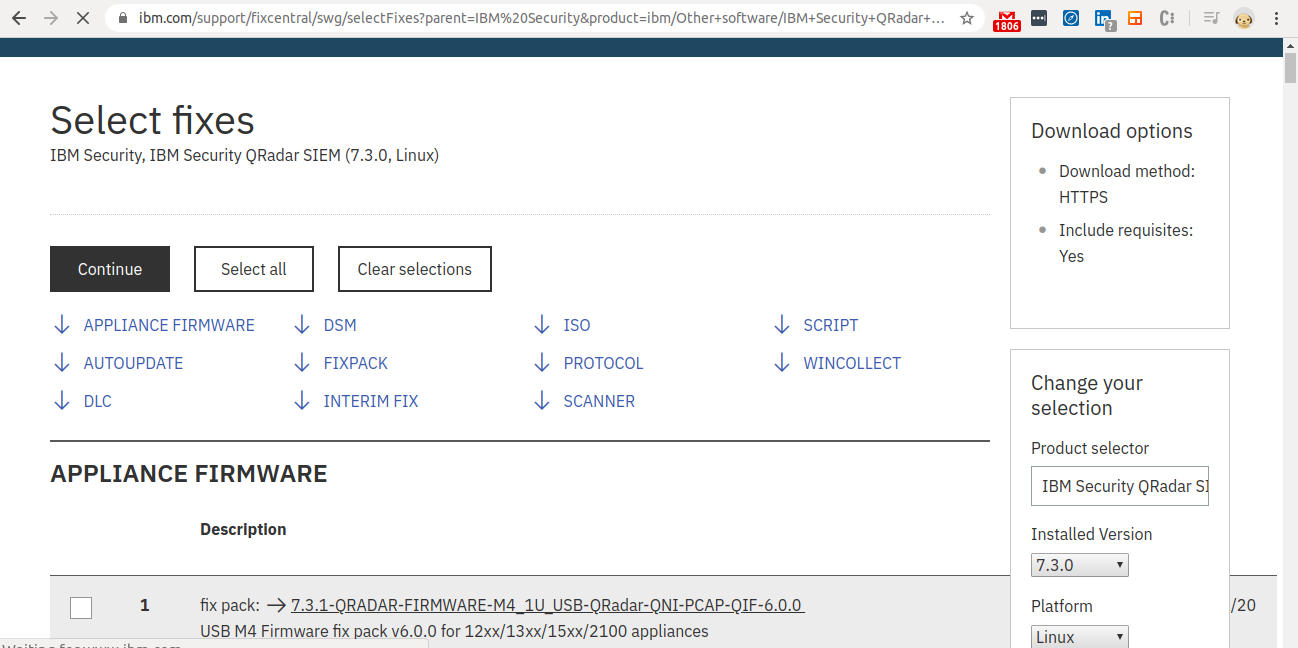
Step 12 - QRadar Selection
- Go to the IBM fixcentral with this link.
- Create an account with IBM using metronlabs ID.
- Select QRadar SIEM as shown in the image.
- And click on “Continue."
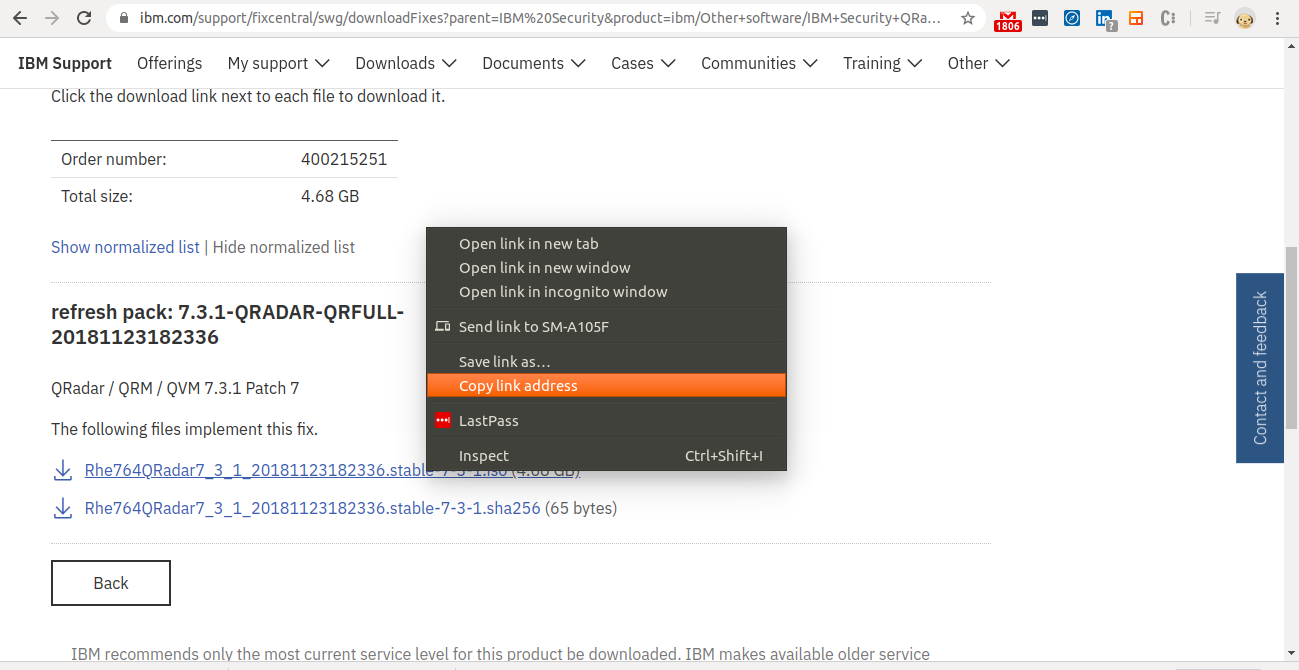
Step 13 - Selecting an ISO for QRadar.
- Select the “ISO” option.
Step 14 - Copy the ISO Link
- Copy the download link for QRadar version 7.3.3.
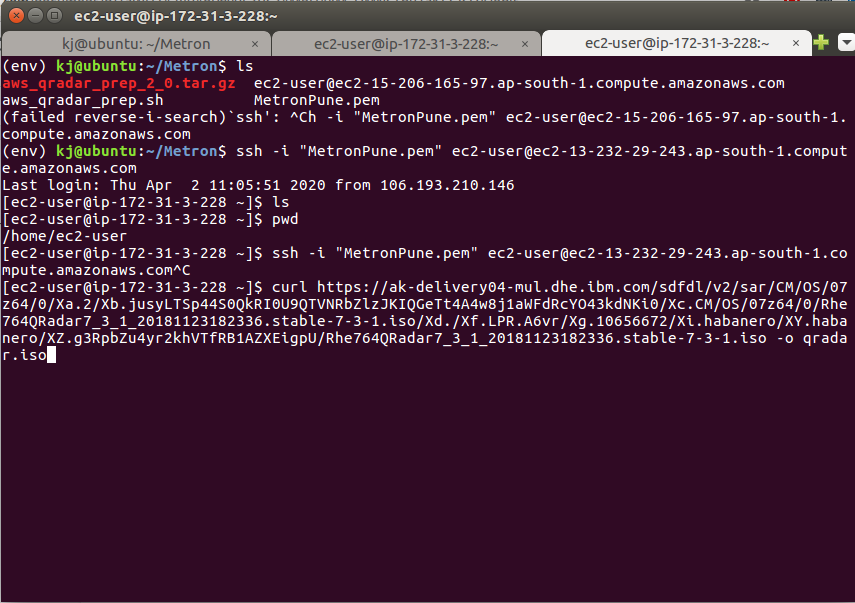
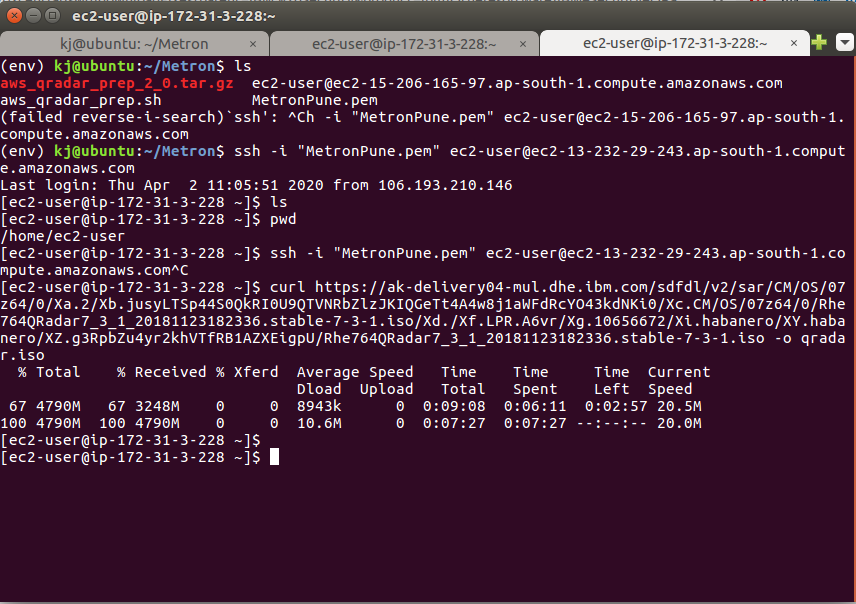
Step 15 - Download the QRadar ISO in the EC2 Instance
- Go the EC2 instance:
Curl the copied link as shown in the image.
(Don’t forget to append -o qradar.iso at the end).
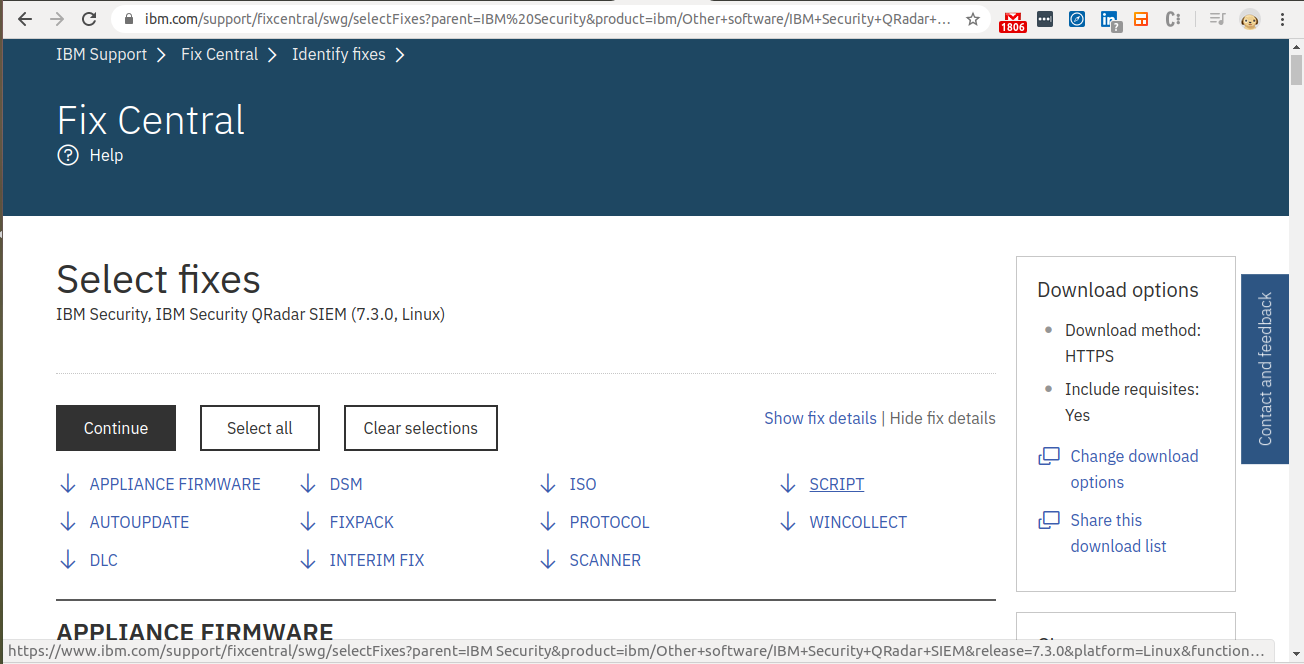
Step 16 - Navigate to Script
- Go to the “Identity Fixes” tab.
- Click on “Script."
Step 17 - Select Script to Partition EC2 instance
- Click on the the “AWS-7.3.0-QRADAR-QRSCRIPT".
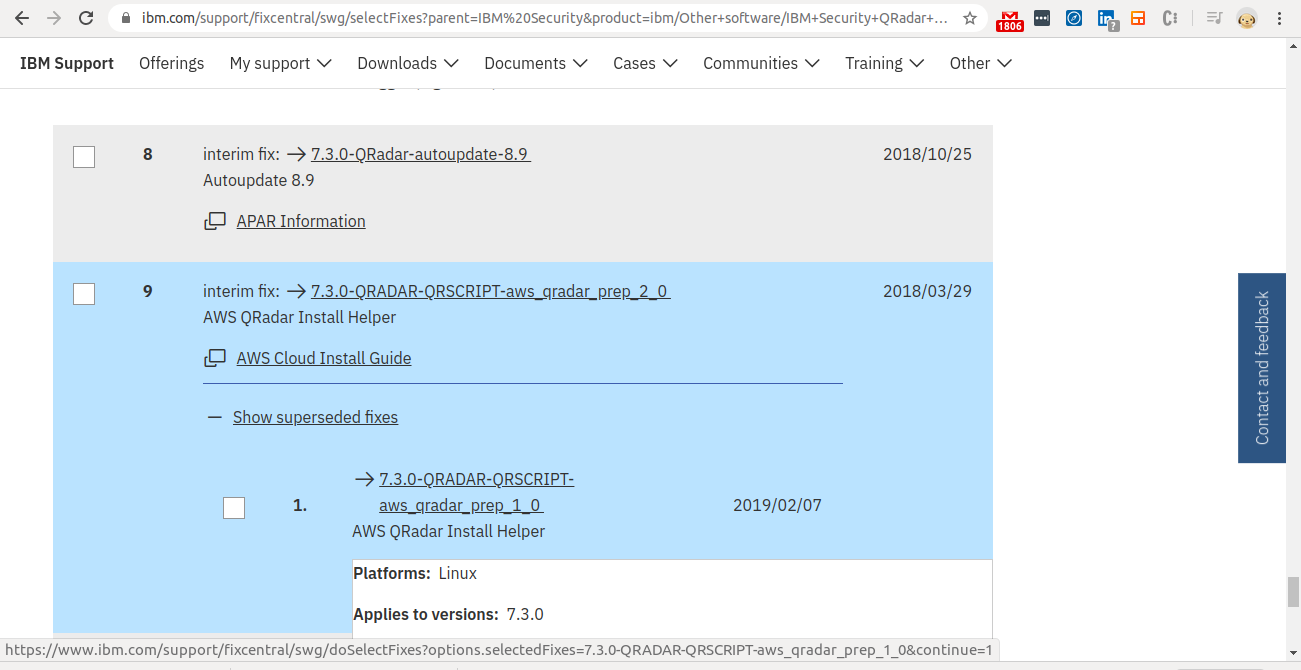
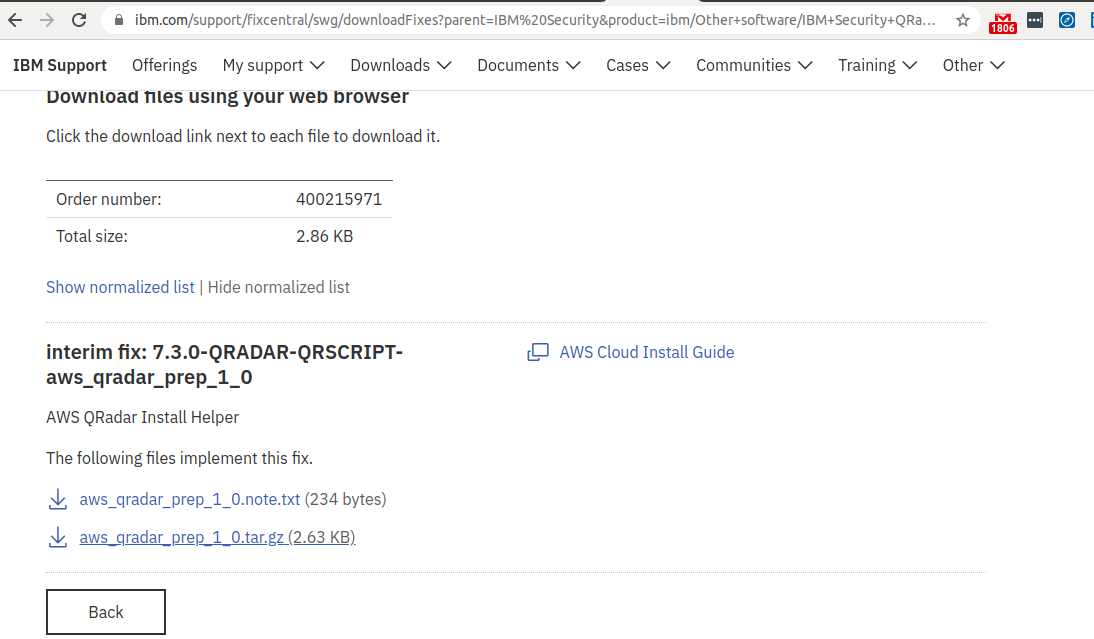
Step 18 - Download the Script to the Partition EC2 instance
- Download the script locally (if this script is not found online, it is given at the end of this document).
Step 19 - Copy the script to EC2 Instance

Step 20 - Check if the QRadar ISO is downloaded
- If it is downloaded, its size should be around 4700 MB.
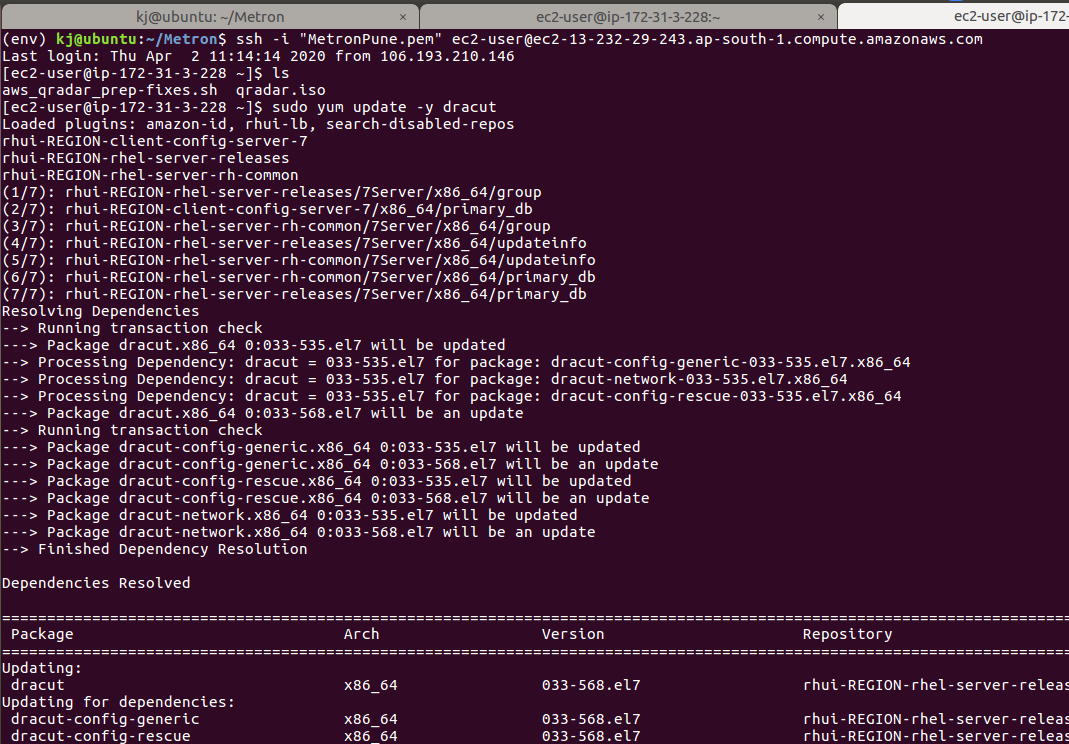
Step 21 - Install Dracut
Step 22 - Run the QRadar-AWS helper script

Step 23 - Mount the QRadar ISO and Start the Setup
1sudo mount -o loop /home/ec2-user/qradar.iso /media/cdrom/
- After the ISO is mounted, execute the below commands:
1sudo cp /etc/sysconfig/network /root 2sudo cp /etc/sysconfig/network-scripts/ifcfg-eth0 /root 1sudo /media/cdrom/setup

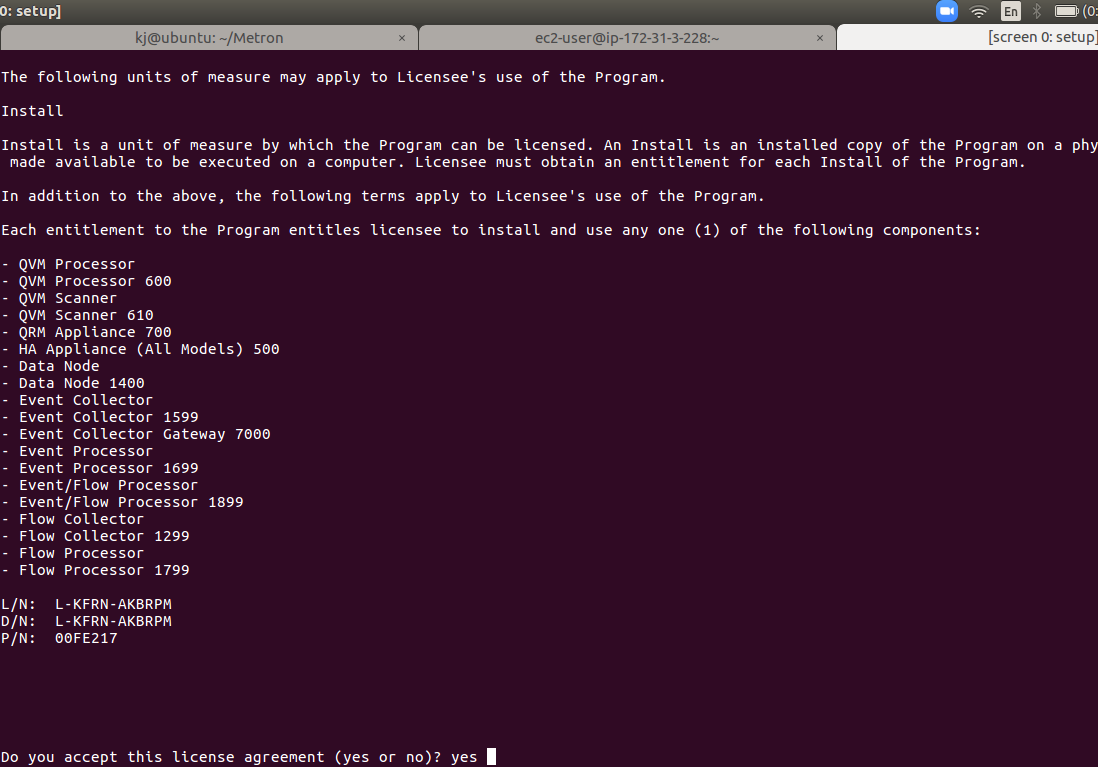
Step 24 - Installing QRadar: Accept the license
- You need to read the license agreement.
- Use the spacebar to scroll through the agreement and type "yes."
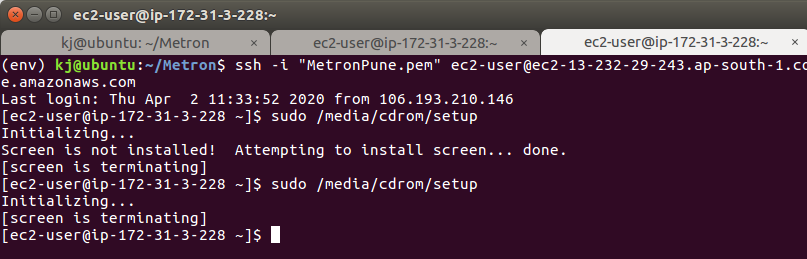
Step 25 - Installing QRadar: Installing Screen
- The QRadar setup will exit to install the screen.
- Reboot the instance with sudo reboot.
Mount the QRadar ISO: 1sudo mount -o loop /home/ec2-user/qradar.iso /media/cdrom/
To start the setup program, type the following command:1sudo /media/cdrom/setup
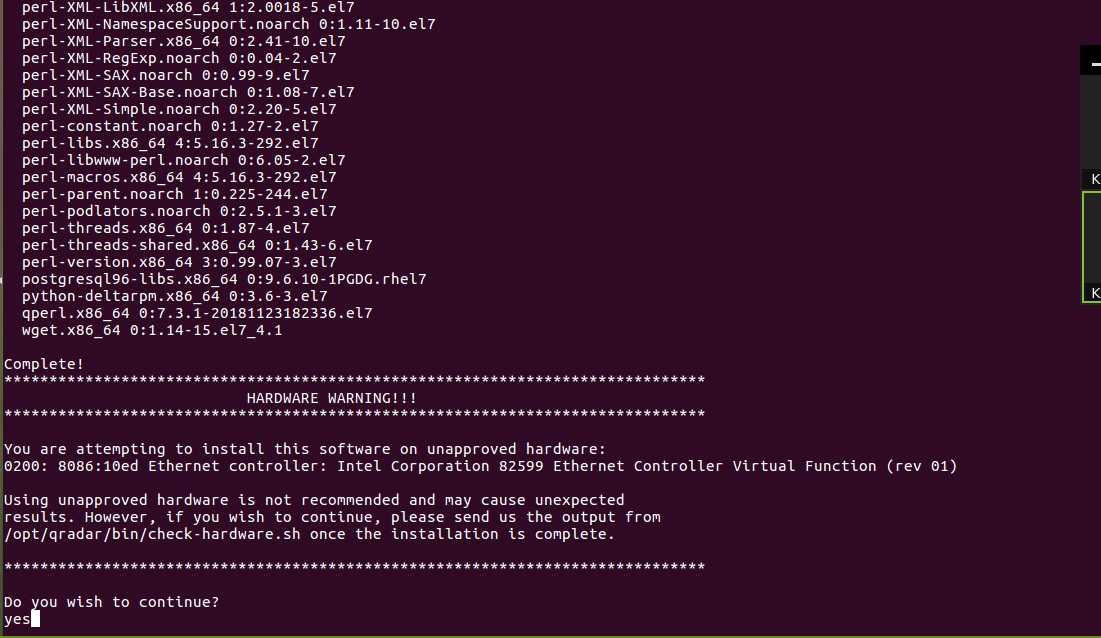
Step 26 - Installing QRadar: Hardware Warning
- The setup will give a hardware warning.
- Type “yes“ and continue.
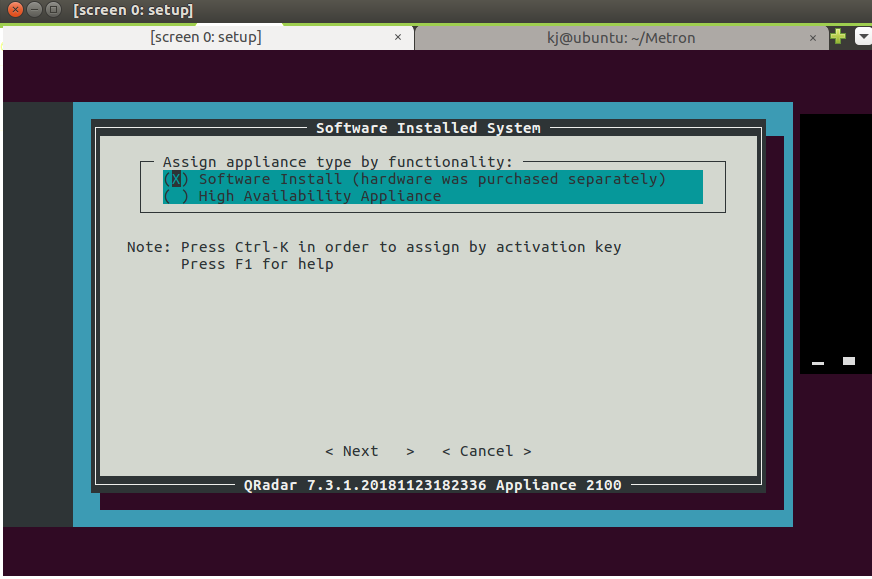
Step 27 - Installing QRadar: Screen Dialogue Box
- Select the Software Install option and press Enter.
Step 28 - Installing QRadar: Screen Dialogue Box
- Select Normal Setup and press Enter.

Step 29 - Installing QRadar: Screen Dialogue Box
- Keep Default and move to next.

Step 30 - Installing QRadar: Screen Dialogue Box
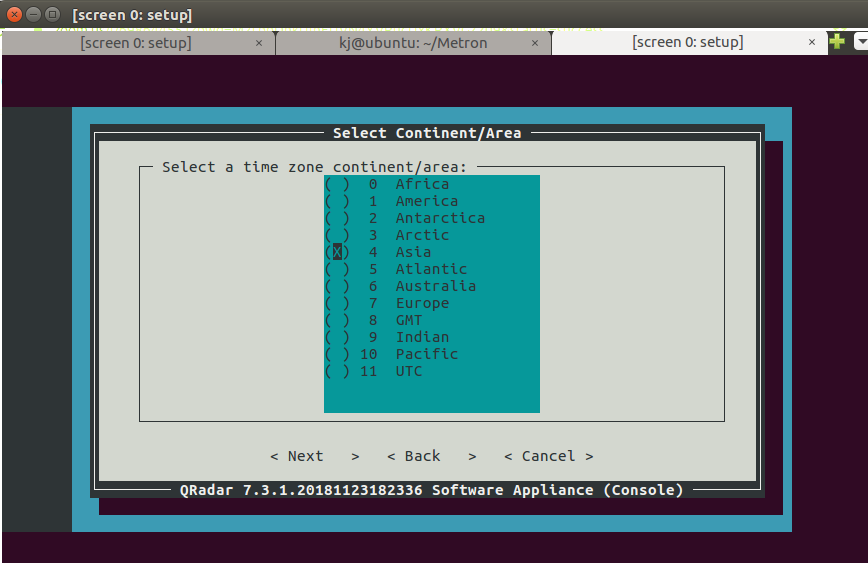
- Select the appropriate time zone continent and press Enter.
Step 31 - Installing QRadar: Screen Dialogue Box
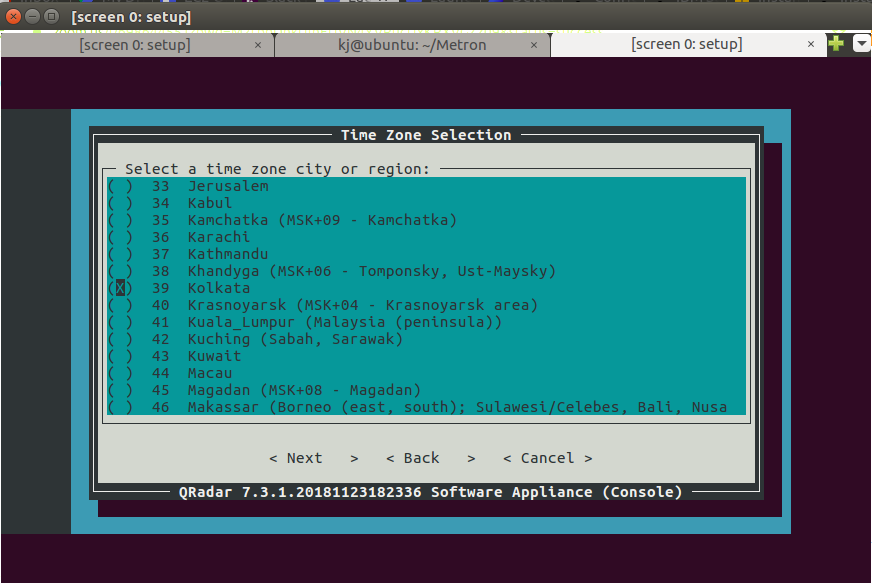
- Select the time zone city or region and press Enter.
Step 32 - Installing QRadar: Screen Dialogue Box
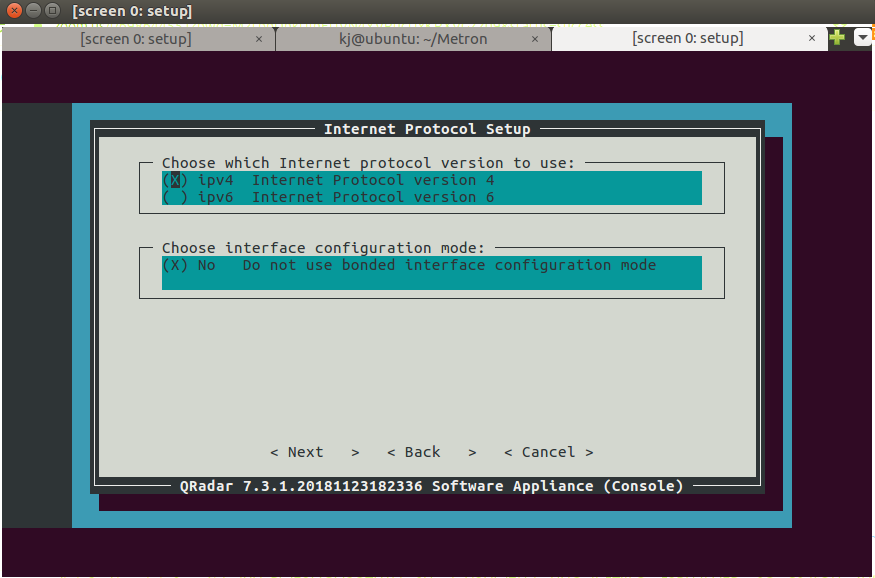
- Select ipv4 and press Enter.
Step 33 - Installing QRadar: Screen Dialogue Box
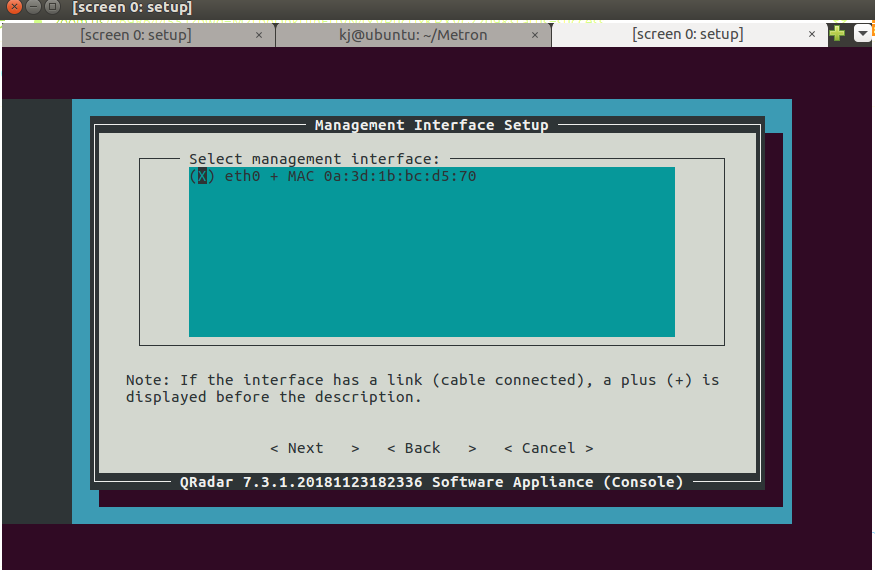
- Select eth0 and press Enter.
Step 34 - Installing QRadar: Screen Dialogue Box
- Keep the Default IP and press Enter.

Step 35 - Installing QRadar: Screen Dialogue Box
- Keep a simple password as it has to be changed later.
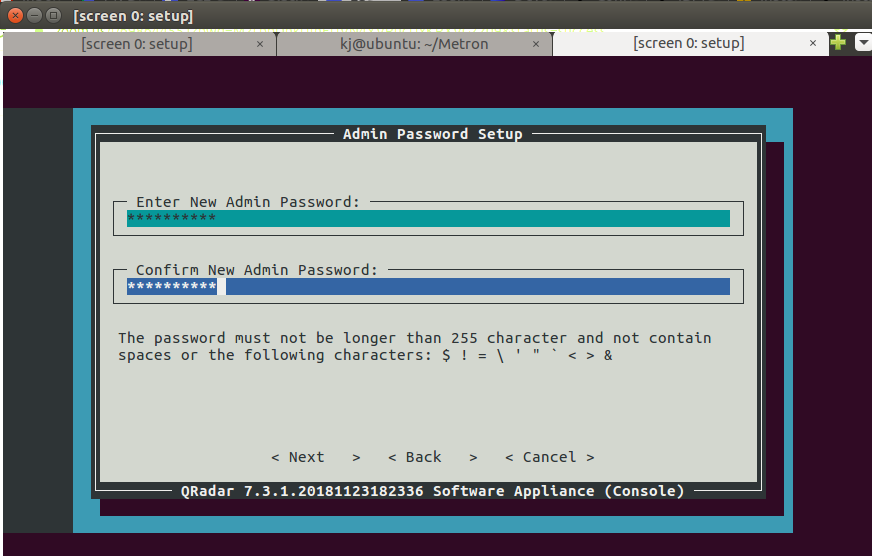
Step 36 - Installing QRadar: Screen Dialogue Box
- After this point, it takes time to reach completion.
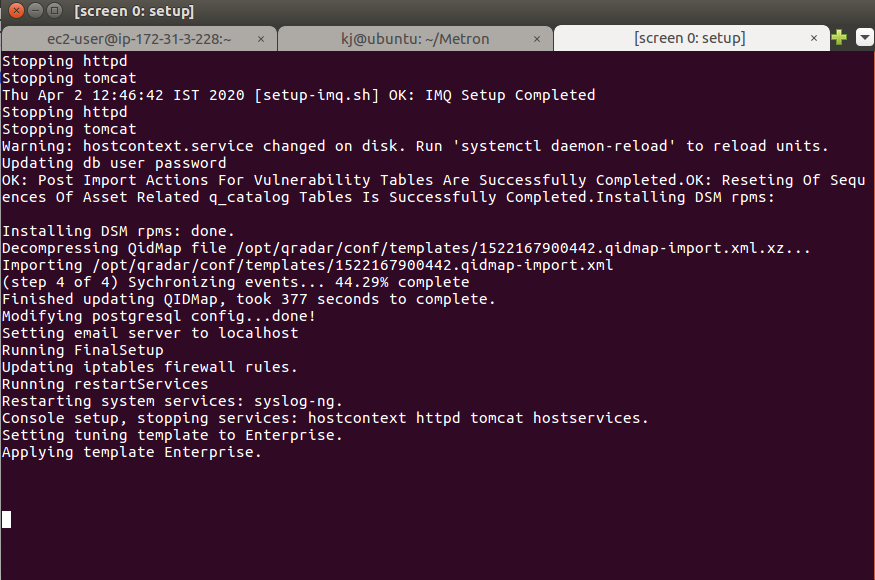
Final Step - After Installation
- Copy the public DNS IP of your EC2 instance
- Hit it from your Browser
- You will be redirected to QRadar, this may take some time
All set!
Additional Troubleshooting
Once you're all installed and set up, be sure to review these items as well:
- Check the security group and edit them if the source IP needs changes.
- If the QRadar is not responsive after hitting from the browser, add a rule for https on the AWS instance.
- If you encounter an Error: Aborting, user answered No to: /store directory should be on it's own mount point. qradar - > Run the aws_qradar_prep.sh , to partition the non-root devices. Create a copy of the script on your machine and scp to the QRadar instance (the script is given below).
- If you encounter this Error: If no events are being generated in the Log activity tab, Apply this fix with sudo privileges.
Code
Lastly, here is the code as promised:
#!/bin/bash
DEVICE_NAME=
DEVICE_DATA=
SCRIPT=$(echo $0 | awk -F "/" '{print $NF}')
REV="v0.1"
LOG="$SCRIPT.log"

Log() {
        NOW=$(date +"%b %d %H:%M:%S %Y")
        echo "$NOW: $@" >> $LOG
}

Run() {
	Log $@
        OUT=$("$@" 2>&1 | tee -a $LOG)
        RET=$?
        if [ $RET -gt 0 ]
	then
		echo -e "ERROR: An error occurred running '$@':\n$OUT"
		exit $RET
	fi
}

LogVar() {
        value=`eval echo '$'$1`
        Log "$1 = '$value'"
}

Error() {
        echo ""
        echo ""
        Log "[ERROR] $@"
        >&2 echo "ERROR: $@"
        exit 255
}

function Version()
{
        echo "$SCRIPT $REV"
}

function Usage()
{
        Version
	echo "This script is intended to be used to prep the AWS RHEL-7.3_HVM_GA-20161026-x86_64-1-Hourly2-GP2 AMI for the installation or upgrade of QRadar 7.3"
	echo "Usage: $SCRIPT {ARGS}"
	echo -e "\t-i|--install\t\t:: Preps the ec2 instance for the installation of QRadar. The system will automatically reboot upon completion."
	echo -e "\t-u|--upgrade\t\t:: Preps the ec2 instance for the upgrade of QRadar. The system will automatically reboot upon completion."
	echo
}


OSChanges() {
	echo "INFO: Disabling SELINUX and external repos..."
	Run sed -i -e 's/LANG.*/LANG="en_US.UTF-8"/g' /etc/locale.conf
	Run sed -i -e 's/^SELINUX=.*$/SELINUX=disabled/g' /etc/selinux/config
	Run sed -i -e 's/plugins=1/plugins=0/' /etc/yum.conf
	Run mkdir -p /etc/yum.repos.d.old
	Run mv /etc/yum.repos.d/* /etc/yum.repos.d.old/
	Run yum clean all

	# Enable root auth and direct ssh access, this is required if you want to add multiple hosts to QRadar
	echo "INFO: Enabling root login and ssh password authentication."
	Run sed -i -e 's/^PasswordAuthentication.*/PasswordAuthentication yes/g' /etc/ssh/sshd_config
	Run sed -i -e 's/^#*PermitRootLogin.*/PermitRootLogin yes/g' /etc/ssh/sshd_config
	Run systemctl reload sshd.service

	#Run yum update -y rh-amazon-rhui-client
	#Run yum-config-manager --enable rhui-REGION-rhel-server-optional


	echo "INFO: Rebooting to completely disable SELINUX."
	Run shutdown -r now
}

DiskSetup() {
	# Discover all the disks without partitions
	echo "INFO: Discovering non root devices that can be partitioned..."
	declare -a DISKS=($(lsblk | grep -v $(lsblk | grep -B1 part | grep disk | awk '{print $1}') | grep disk | awk '{print $1}'))
	if [ "${#DISKS[@]}" -eq 0 ]
	then
		Error "There does not appear to be any devices that are not curently partitioned. Please free up a device."
	fi
	echo "INFO: Found ${#DISKS[@]} devices."

	# Install the LVM tools
	echo "INFO: Installing lvm tools..."
	Run yum install -y lvm2


	# Partition, setup LVM, and fstab
	if [ "${#DISKS[@]}" -eq 1 ]
	then
		DEVICE_NAME="/dev/"${DISKS[0]}
		echo "INFO: Partitioning $DEVICE_NAME and creating LVM groups."
		Run parted -a optimal --script ${DEVICE_NAME} -- mklabel gpt
		Run parted -a optimal --script ${DEVICE_NAME} -- mkpart swap 0% 24GiB # SWAP
		Run parted -a optimal --script ${DEVICE_NAME} -- mkpart xfs 24GiB 64GiB # /var/log /storetmp
		Run parted -a optimal --script ${DEVICE_NAME} -- mkpart xfs 64GiB 100% # /store /transient

		# A sleep of 1 would likely work here
		COUNTER=0
		while [ ! -b ${DEVICE_NAME}2 ]
		do
			sleep 1
			let COUNTER=$((COUNTER+1))
			if [ $COUNTER -ge 30 ]
			then
				Error "Unable to find ${DEVICE_NAME}2 after $COUNTER seconds."
			fi
		done

		Run pvcreate ${DEVICE_NAME}2
		Run vgcreate rootrhel ${DEVICE_NAME}2
		Run lvcreate -l 50%FREE -n varlog rootrhel
		Run lvcreate -l 100%FREE -n storetmp rootrhel
		Run mkfs.xfs /dev/mapper/rootrhel-varlog
		Run mkfs.xfs /dev/mapper/rootrhel-storetmp

		Run pvcreate ${DEVICE_NAME}3
		Run vgcreate storerhel ${DEVICE_NAME}3
		Run lvcreate -l 80%FREE -n store storerhel
		Run lvcreate -l 100%FREE -n transient storerhel

		Run mkswap -L swap1 ${DEVICE_NAME}1
		Run mkfs.xfs /dev/mapper/storerhel-store
		Run mkfs.xfs /dev/mapper/storerhel-transient

		Run sed -i -e "s/\(.*${DISKS[0]}.*\)/#\1/g" /etc/fstab
		Run sed -i -e "s/\(.*rootrhel.*\)/#\1/g" /etc/fstab
		Run sed -i -e "s/\(.*storerhel.*\)/#\1/g" /etc/fstab

		echo "${DEVICE_NAME}1 swap  swap defaults 0 0" >> /etc/fstab
		echo "/dev/mapper/rootrhel-storetmp /storetmp xfs inode64,logbsize=256k,noatime,nobarrier 0 0" >> /etc/fstab
		echo "/dev/mapper/rootrhel-varlog /var/log xfs inode64,logbsize=256k,noatime,nobarrier 0 0" >> /etc/fstab
		echo "/dev/mapper/storerhel-store /store xfs inode64,logbsize=256k,noatime,nobarrier 0 0" >> /etc/fstab
		echo "/dev/mapper/storerhel-transient /transient xfs inode64,logbsize=256k,noatime,nobarrier 0 0" >> /etc/fstab
	else
		echo "INFO: There are ${#DISKS[@]} available but we're only using up to 1 automatically at present. Ignoring the rest..."
		break
	fi

	# Make directories and mount them
	echo "INFO: Making directories and mounting..."
	Run mkdir -p /store
	Run mount /store
	Run mkdir -p /storetmp
	Run mount /storetmp
	Run mkdir -p /transient
	Run mount /transient
	Run mv /var/log /var/oldlog
	Run mkdir -p /var/log
	Run mount /var/log
	Run mv /var/oldlog/* /var/log/
	Run mkdir -p /media/cdrom

	Run swapon -a
}

InstallPrep() {
	DiskSetup
	OSChanges
}

UpgradePrep() {
	eval `blkid -t LABEL=storetmp -o export`
	eval `blkid -t LABEL=/store/tmp -o export`
	echo UUID=$UUID /storetmp $TYPE defaults,noatime 1 1 >> /etc/fstab

	mkdir -p /media/cdrom
	mkdir -p /storetmp
	mount /storetmp

	# Change MAC in AUTO_INSTALL_INSTRUCTIONS
	IFACE=$(grep ai_ip_management_interface /storetmp/AUTO_INSTALL_INSTRUCTIONS | awk -F= '{print $2}')
	MAC=$(cat /sys/class/net/$IFACE/address)
	sed -i -e s/ai_ip_management_interface.*$/ai_ip_management_interface=$IFACE=$MAC/ /storetmp/AUTO_INSTALL_INSTRUCTIONS

	mkdir -p /store
	mkdir -p /transient
	eval `blkid -t LABEL=/store -o export` ; \
    eval `blkid -t LABEL=store -o export` ;  echo UUID=$UUID /store $TYPE defaults,noatime 1 1 >> /etc/fstab
	eval `blkid -t LABEL=transient -o export` ; eval `blkid -t LABEL=/store/transient -o export` ; echo UUID=$UUID /transient $TYPE defaults,noatime 1 1 >> /etc/fstab
	eval `blkid -t LABEL=/var/log -o export` ; echo UUID=$UUID $LABEL $TYPE defaults,noatime 1 1 >> /etc/fstab
	echo  "$(blkid -t LABEL=swap1 | cut -d: -f1) swap  swap defaults 0 0" >> /etc/fstab
	OSChanges
}


################################################################################################################################
#
# MAIN
#

# Run as root

if [ $(id -u) -ne 0 ]
then
        echo "ERROR: You must run this as root."
	Usage
	exit 255
elif [ "$#" -eq 0 ]
then
	echo "ERROR: No arguments were passed."
	Usage
	exit 255
fi

# Read in command line arguments
while getopts "iuvh-:" OPT
do
        case $OPT in
        h)
                Usage
                exit 0
                ;;
        v)
                Version
                exit 0
                ;;
	i)
		InstallPrep
		;;
	u)
		UpgradePrep
		;;
        -)
                case $OPTARG in
                        help)
                                Usage
                                exit 0
                                ;;
                        version)
                                Version
                                exit 0
                                ;;
                        upgrade)
                                UpgradePrep
                                ;;
			install)
				InstallPrep
				;;
                esac
                ;;
        *)
                echo "ERROR: Unknown argument '$OPTARG' was passed."
                Usage
                exit 255
                ;;
        esac
done
About Metron
Metron is a trusted provider of on-demand and effective approaches to managing third-party integrations for security ecosystems. With extensive experience in delivering automation solutions for over 200 security applications, Metron has earned the trust of numerous fast-growing security companies and managed security service providers (MSSPs).
Metron’s transparent development processes, deep understanding of security products, and fixed-cost model have resulted in shorter development times and significant cost savings for clients compared to deploying internal engineering teams for similar tasks. Headquartered in Novato, CA, with development offices in Bangalore and Pune, India, you can connect with Metron at connect@metronlabs.com.