Installation of Splunk Phantom/SOAR Using Virtual Machine
In the following guide, we'll walk you through installing Splunk SOAR using a virtual machine and Linux.

Splunk SOAR (formerly known as Phantom) can be a powerful addition to most enterprises' security ecosystems.
In the following guide, we'll walk you through installing Splunk SOAR using a virtual machine and Linux.
Pre-requisites:
- Centos Virtual machine with version CentOS-7-x86_64-Minimal-2009.iso should be installed
- Ubuntu virtual machine should be installed
Steps for installation of Splunk Phantom/SOAR
- Open Ubuntu machine and download Unprivileged Splunk SOAR 5.4.0.101028 file from https://my.phantom.us/downloads/
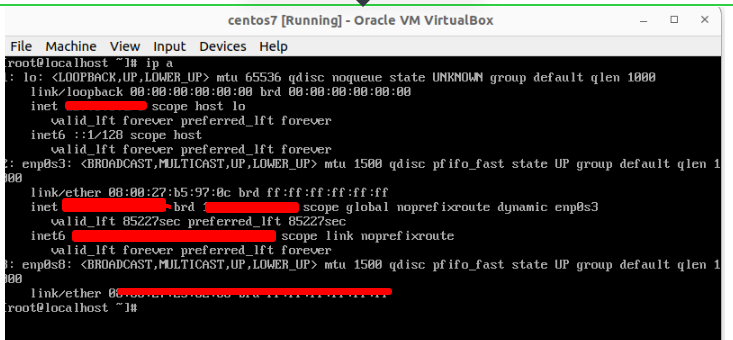
2. Open Centos machine terminal and use the comand “ip a” to find its ip address.
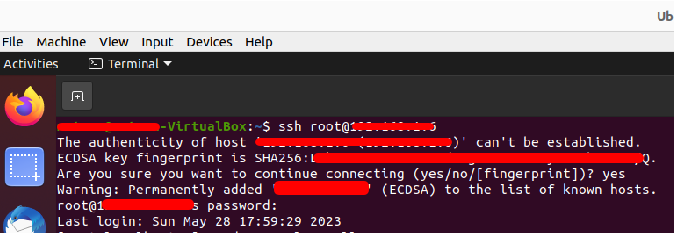
3. On the Ubuntu machine, open the terminal and run the command “ssh root@<ip_address>”. Here, in place of <ip address>, enter centos machine’s ip address. Enter the password set for the root user in Centos machine to connect to it.
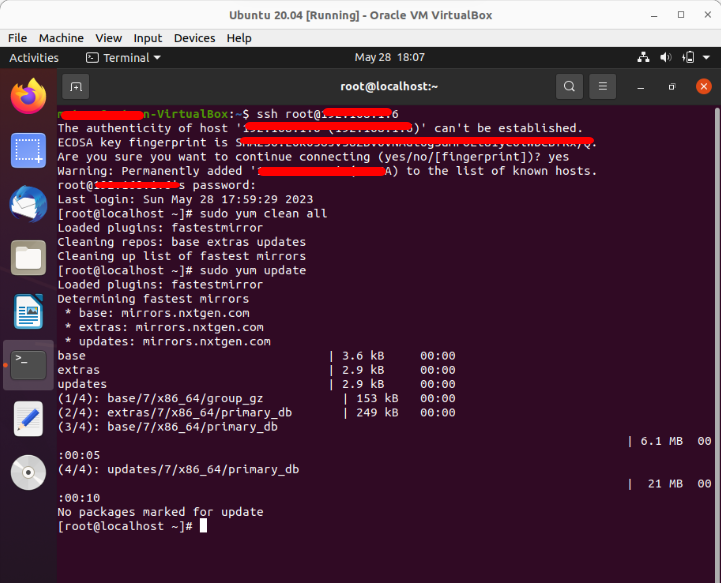
4. After getting connected to the Centos machine from Ubuntu machine, run the following commands "sudo yum clean all" and " sudo yum Update"
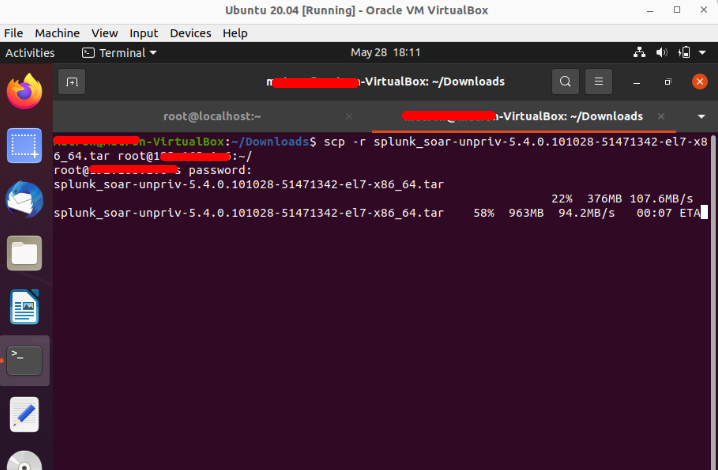
5. Open another terminal in Ubuntu and run the command and navigate to the location where Splunk SOAR 5.4.0.101028-51471342-el7-x86_64.tar file is downloaded. Then, run the command “scp -r <downloaded file name> root@<ip_address>:~/ “ where <ip_address> is the ip address of Centos machine and <downloaded file name> is splunk_soar-unpriv-5.4.0.101028-51471342-el7-x86_64.tar
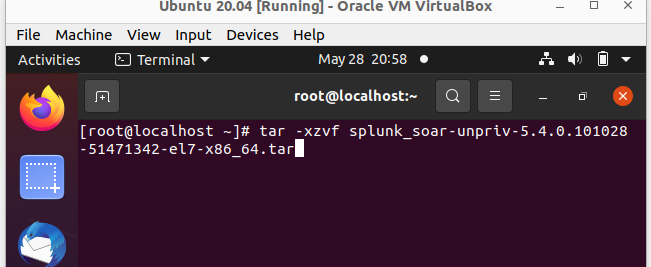
6. Run the command “tar -xzvf <downloaded file name>” to extract the copied file, where <downloaded file name> is splunk_soar-unpriv-5.4.0.101028-51471342-el7-x86_64.tar
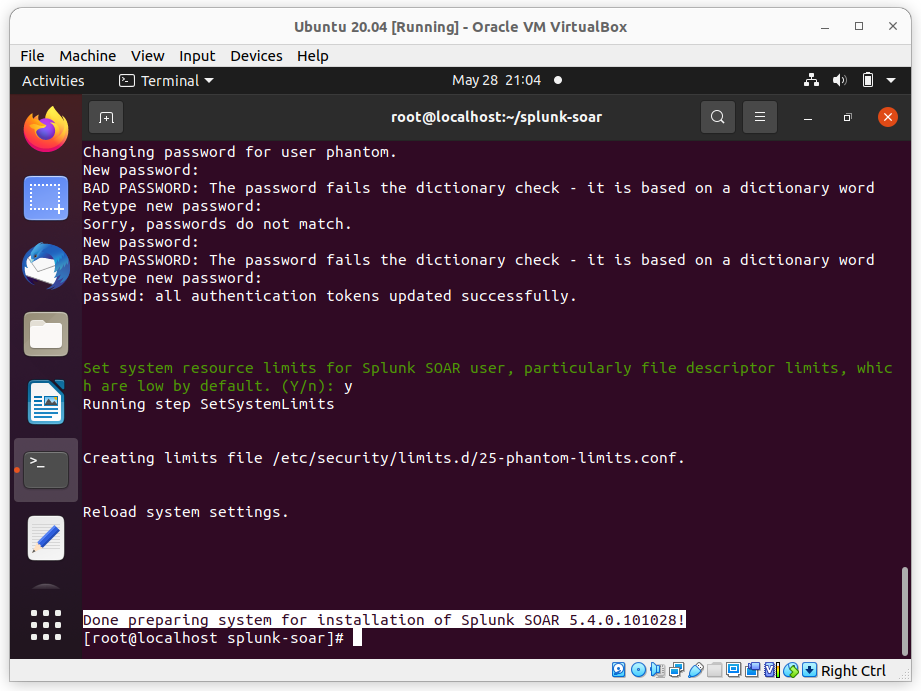
7. Navigate to the splunk-soar directory using command “cd spunk-soar/”. Run the command “sudo /soar-prepare-system --splunk-soar-home <home_directory>” to create a ‘phantom’ user in the machine.
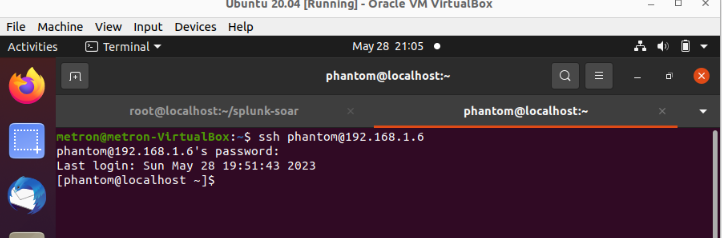
8. Open new terminal and connect with phantom user with command “ssh phantom@<ip_address>”
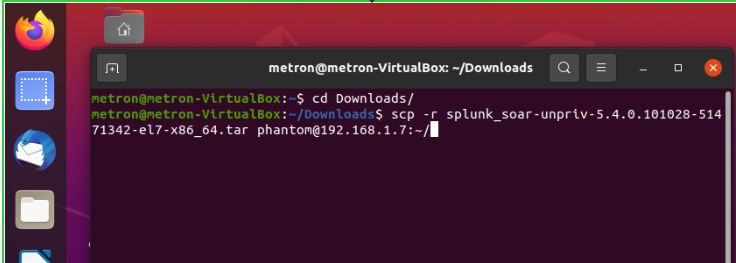
9. Open another terminal and run the command and navigate to the location where Splunk SOAR 5.4.0.101028-51471342-el7-x86_64.tar file is downloaded. Then, Run the command “scp -r <downloaded file name> phantom@<ip_address>:~/ “ where <ip_address> is ip address of Centos machine and <downloaded file name> is splunk_soar-unpriv-5.4.0.101028-51471342-el7-x86_64.tar
10. Run the command “tar -xzvf <downloaded file name>” to extract the copied file, where <downloaded file name> is splunk_soar-unpriv-5.4.0.101028-51471342-el7-x86_64.tar

11. Run the command “./soar-install --splunk-soar-home <home-directory> --ignore-warnings” to install splunk phantom in the machine.
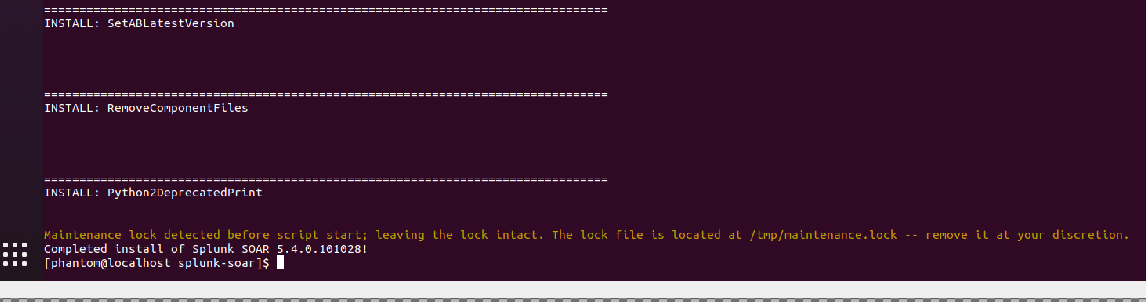
After this, you should be all set - your deployment of Splunk Phantom complete!
About Metron:
Metron is a trusted provider of on-demand and effective approaches to managing third-party integrations for security ecosystems. With extensive experience in delivering automation solutions for over 200 security applications, including Spunk SOAR, Metron has earned the trust of numerous fast-growing security companies and managed security service providers (MSSPs).
Metron’s transparent development processes, deep understanding of security products, and fixed-cost model have resulted in shorter development times and significant cost savings for clients compared to deploying internal engineering teams for similar tasks. Headquartered in Novato, CA, with development offices in Bangalore and Pune, India.
Connect with Metron at connect@metronlabs.com.